By
Ryan Halston
As time goes on, the choice to go “green” in overall lifestyle continues to become more and more popular. A large goal that remains consistent is to develop a lifestyle catered toward living without using up natural resources. The goal to live in an efficient manner has immensely positive connotations toward the environment, and can provide multiple benefits on an individual level as well.
Self-sustenance advocates a life in search of happiness free of material dependency. It highlights a more genuine happiness that is provided by things that aren’t purchased, and family values often see a major rise when adapting to a self-sustaining lifestyle. Casting out the quest for material things to increase happiness, concentration is then focused more on the important things in life.
Generally, the primary reason people make the choice to live self-sufficiently are the financial benefits. The school of thought behind this is that the less one needs, the less one needs to purchase. In cutting down this consumption, there will be less money spent on both material items, as well as things that may be unnecessary.
Making the greener choice is also a great way to take advantage of a multitude of nutritional benefits that self-sufficient living provides. Growing your own crops, fruits, and veggies can help immensely in living simple and self-sustained. This can help to cut costs, as well as prevent pesticides and other chemical influences on the food being ingested. There have been multiple cases in the past of chemicals, pesticides, nitrosamines and even asbestos exposure.
Taking even small steps towards simplifying individual lifestyles can help make strides toward reducing over consumption and over-usage; reducing pollution and other environmental dangers. Spreading general knowledge and the benefits of this lifestyle hopefully will continue to make it more popular throughout the future. These recent trends towards going green, and taking part in simple and sustainable lifestyles are becoming more and more popular and with good reason. There’s so many benefits that it’s hard to not at least make an attempt to try some of the methods and ways of life that positive contribute towards the environment. With the rising trends of over-consumption in the not-too-distant past, the change towards self-sufficient simplicity is a gladly received movement.
~~~~~~~~~~~~~~~~~~~~~~~
Thank you for your post Ryan.

Donate Now!

Buy a membership or koozies to help!
Showing posts with label guest blogger. Show all posts
Showing posts with label guest blogger. Show all posts
Friday, May 20, 2011


Saturday, January 08, 2011
Advice on Ordering Seeds (guest post)
Been awhile since a guest blogger has graced these pages. enjoy!
This post was written by Amy who writes the blog My Suburban Homestead, where you can find her writing about cooking, gardening, animals, parenting, and greener living.
Advice on ordering seeds

Seed catalogs have been streaming into my mailbox and whetting my appetite for spring. If there was a 12 step meeting for vegetable seeds, I surely would be a candidate---I find the descriptions irresistible and want to plant everything I see. However, I've learned over the years that carefully selecting which seeds to grow in the garden will greatly enhance my success. Here are some thoughts for you to consider.
Length of Growing Season
Probably the most important aspect for you to consider when purchasing seed varieties is the length of your growing season. For example, there are many wonderful heirloom varieties that I would like to grow, but some of them require a very long period of warm weather to mature and I might be better off choosing a different variety. Conversely, there are some cool weather crops, such as peas and lettuce that require a period of relatively moderate temperatures to grow well.
 So, when deciding whether or not to purchase a particular vegetable seed, you first must ask yourself this question: Is my season long enough for this particular vegetable to grow? Answering this question can be a bit complicated. Finding out which zone you live in can help you determine your period of frost-free weather for planting frost-sensitive vegetables. But there are other temperature related variables that are important as well, such as considering just how hot your daytime temperatures are likely to get, amount of rainfall (which will affect your soil temperature) or if your nights cool off significantly due to your proximity to the ocean, etc.
With time, the answers to these questions will come to you easily. But if you are a beginning gardener, calling the seed supplier and providing details as to your growing conditions will help them answer this question. You can also ask other gardeners, such as neighbors or gardeners on forums such as the Kitchen Gardeners forum.

Saving Money
I used to have a habit of buying tons of those little seed packs, which can rack up a sizable bill rather quickly. One trick I've learned is that once I've found a vegetable seed I like is to buy seed packages in larger sizes through the mail order/website suppliers. The purchase price for seeds goes down considerably when you purchase larger quantities. For example, consider the prices on this Carson Bean seed through Territorial. A one ounce package of seed costs $2.20, but if I were to purchase a 1/2 pound package for $6.95, the price of the seeds would go down to 86 cents per pound. This could be especially advantageous if one were to go in on purchases with friends and family on seed purchases.
On caveat: a few seed species, such as corn and onions, do not last long. Their seed is listed to remain viable for only a year. Make sure to check the catalog.
Recommendations from other gardeners
On many gardening websites, such as the Kitchen Gardener's International website, people discuss their success or failure with particular varieties. I find reviews of particular seeds to be quite helpful. The only drawback is that the gardener reviewing the seed could life in an entirely different zone and seeds may behave differently than where you intend to plant them. I have a page on my website, in which I've collected articles and reviews of particular seeds.
Seed Lingo
Certain vegetables have many terms attached to them that are rarely defined and can be confusing to the uninitiated. I've written some helpful articles on my blog (listed below) to help shed light on the issue. Check out the links listed below:
Beans
Carrot terminology
Corn: hybrid sweet corn varieties and differences between grain types
Onion varieties
Potato terminology
Pepper varieties
Tomato terminology
Seed sources
A list of my favorite seed sources and descriptions of what they sell are located here.
Happy gardening!
Tuesday, November 24, 2009
Depression Gift; Stitches
It is now a well established fact that I can't sew. Nor can I knit or crochet. I can do some pretty cool stuff with metal wire however, and we will get to that later. I can also tat a bit. But I know that some of you out there can and do these this.
Cristine from over at the Treasure Goddess blog left a comment about what she is making for Christmas. I love wrist warmers.
CO 40 stitches, join in the round.
k1, p1 rib for 4 rounds
k3, p1 every round for 5-6 inches from start, then go back and forth (no longer in the round, leaving an opening) still in the K3, P1 pattern (when you go back on the wrong side you're K1, P3 --knit the knits and purl the purls)
knit & purl in pattern back & forth for 12 rows, then go back to knitting tbe pattern in the round for 6 rows.
K1P1 for 4-6 rows and bind off.
(It's actually easier than it sounds).
A few years back, before anyone knew I was here, a friend, JennyO wrote a great article for me on knitting
The first thing she ever made

stockinette:

you can read her article was back in the neophyte vault, here, Guest Blogger; The Neophyte Knitter.
Cristine from over at the Treasure Goddess blog left a comment about what she is making for Christmas. I love wrist warmers.
CO 40 stitches, join in the round.
k1, p1 rib for 4 rounds
k3, p1 every round for 5-6 inches from start, then go back and forth (no longer in the round, leaving an opening) still in the K3, P1 pattern (when you go back on the wrong side you're K1, P3 --knit the knits and purl the purls)
knit & purl in pattern back & forth for 12 rows, then go back to knitting tbe pattern in the round for 6 rows.
K1P1 for 4-6 rows and bind off.
(It's actually easier than it sounds).
A few years back, before anyone knew I was here, a friend, JennyO wrote a great article for me on knitting
The first thing she ever made
stockinette:
you can read her article was back in the neophyte vault, here, Guest Blogger; The Neophyte Knitter.
Sunday, October 15, 2006
Guest Blogger: Thatu
I think this is a great charity, and have asked Ali to tell me more about it.
Thank you Phelan for asking me to contribute this piece to your blog. Today I would like to tell your readers about, and invite them to get involved with, a charity called Thatu.
Thatu is a UK registered charity established in 2004, that fund-raises to support grass roots and self-help projects in areas of South Africa that are challenged by scarce resources and the effects on the community of the HIV / AIDS epidemic.
Thatu at present focuses on the support of community run organic permaculture food gardens.
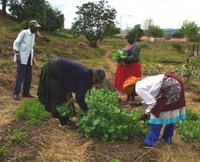
Why food gardens?
In the areas that Thatu works, where children have been lucky enough to acquire school places, sometimes they do not get regular food and it is very hard to concentrate on learning school work when hungry. Also, where adults suffering from HIV/AIDS are fortunate enough to have access to retro viral medicines, these only work optimally when the patient has good nutrition.
Apart from the obvious nutritional benefits that a food garden can provide, community food gardens linked with schools allow the acquisition of practical permaculture and gardening skills, so that sustainable management of the resources is taken into the community. The gardens are also used for curricular learning about recycling, reuse and more traditional subjects. For example, children might be asked to bring in from home a container of grey water' (recycled washing water). This is then used to water the garden, and the teacher might get the children to estimate mathematically the volume of water needed to supply plants over a certain area.
Produce is shared between the community volunteers that work in the garden, and any excess is sold and the profits shared between the workers and for the benefit of the garden,
Thatu is supporting 5 food gardens in two areas; Pretoria and the notoriously inhospitable Cape Flats. Each site has its own particular problems and challenges. For example, the soil on the Cape Flats is mainly sea sand, and it is blown by strong winds, so the priority there is to use
permaculture methods to help counter some of the challenges; to establish organic wind breaks and enrich the soil. The message that Thatu's projects all send is that gardens can be established in the most unlikely of circumstances.
As well as all the tangible benefits to food gardening, they all have less measurable, but equally important social benefits. They bring the community together, and they bring pride and hope for the future.
Thatu is very concerned that all the money donated gets spent as intended, and has regular monitoring and reports from the projects that can be read at any time by supporters on its website at http://www.thatu.org/ One of our important aims is that the projects are sustainable, and ultimately become independently run and continue to bring benefit to the community into the long term.
How to help Thatu
Of course, one of the most important things is to donate and raise money for the projects, and there are numerous fun and interesting ways you can do this. You can read about the many ways to do this at our website in the 'How you can help' section, but here I will outline just a few ideas.
Penny Pinchers Appeal
Thatu will send you a sticky label which you attach to a recycled container, such as a washed out plastic milk carton or jam jar. You then use this to collect small change for Thatu, and then bank it. To get your label and to participate, and for full details, click here. Penny Pinchers Appeal
Stamp Appeal
Is you save used stamps and mail them to Thatu, they are able to sell them on at a small profit for the charity. All stamps are accepted, as well as coins and first day covers. For full details, click here. Stamp Appeal
Jabula
Jabula in Bantu (an African language) means 'CELEBRATE!' so we use this word as the name for the fund-raising garden parties that our supporters hold to raise money for Thatu. These can be as small as a few friends getting together for coffee, to a full scale fete with games tournaments and musical events! We encourage our supporters to do what they can to use their own gardens to raise money for food gardens in Africa. If you would like to hold a Jabula for Thatu, click here to read more and download a fundraising pack.
Thatu Shop
Thatu has an online shop that sells small gifts - these include children's tools, seeds, envelope re-use labels, and various other nice festive season ideas. Please visit the shop by clicking here.
Shop
Network for Thatu
One of the most important things you can do for Thatu is to talk about it! Thatu can really benefit from the people you know. Corporate and Trust donations are vital to Thatu's survival. If you know anyone who works for a large company who could arrange a donation, and who would benefit from the positive publicity being linked with Thatu could bring, please tell them
about Thatu and introduce them to us.
Donate
Simply make a one off cash donation, by PayPal, by clicking here Donate Now
~Ali

~~~~~~~~~~~~~~~~~
Thank you Ali. I already have the Penny Pintchers Appeal, so I have started. This is a charity that I feel many gardeners could get behind. ~Phelan
Thank you Phelan for asking me to contribute this piece to your blog. Today I would like to tell your readers about, and invite them to get involved with, a charity called Thatu.
Thatu is a UK registered charity established in 2004, that fund-raises to support grass roots and self-help projects in areas of South Africa that are challenged by scarce resources and the effects on the community of the HIV / AIDS epidemic.
Thatu at present focuses on the support of community run organic permaculture food gardens.
Why food gardens?
In the areas that Thatu works, where children have been lucky enough to acquire school places, sometimes they do not get regular food and it is very hard to concentrate on learning school work when hungry. Also, where adults suffering from HIV/AIDS are fortunate enough to have access to retro viral medicines, these only work optimally when the patient has good nutrition.
Apart from the obvious nutritional benefits that a food garden can provide, community food gardens linked with schools allow the acquisition of practical permaculture and gardening skills, so that sustainable management of the resources is taken into the community. The gardens are also used for curricular learning about recycling, reuse and more traditional subjects. For example, children might be asked to bring in from home a container of grey water' (recycled washing water). This is then used to water the garden, and the teacher might get the children to estimate mathematically the volume of water needed to supply plants over a certain area.
Produce is shared between the community volunteers that work in the garden, and any excess is sold and the profits shared between the workers and for the benefit of the garden,
Thatu is supporting 5 food gardens in two areas; Pretoria and the notoriously inhospitable Cape Flats. Each site has its own particular problems and challenges. For example, the soil on the Cape Flats is mainly sea sand, and it is blown by strong winds, so the priority there is to use
permaculture methods to help counter some of the challenges; to establish organic wind breaks and enrich the soil. The message that Thatu's projects all send is that gardens can be established in the most unlikely of circumstances.
As well as all the tangible benefits to food gardening, they all have less measurable, but equally important social benefits. They bring the community together, and they bring pride and hope for the future.
Thatu is very concerned that all the money donated gets spent as intended, and has regular monitoring and reports from the projects that can be read at any time by supporters on its website at http://www.thatu.org/ One of our important aims is that the projects are sustainable, and ultimately become independently run and continue to bring benefit to the community into the long term.
How to help Thatu
Of course, one of the most important things is to donate and raise money for the projects, and there are numerous fun and interesting ways you can do this. You can read about the many ways to do this at our website in the 'How you can help' section, but here I will outline just a few ideas.
Penny Pinchers Appeal
Thatu will send you a sticky label which you attach to a recycled container, such as a washed out plastic milk carton or jam jar. You then use this to collect small change for Thatu, and then bank it. To get your label and to participate, and for full details, click here. Penny Pinchers Appeal
Stamp Appeal
Is you save used stamps and mail them to Thatu, they are able to sell them on at a small profit for the charity. All stamps are accepted, as well as coins and first day covers. For full details, click here. Stamp Appeal
Jabula
Jabula in Bantu (an African language) means 'CELEBRATE!' so we use this word as the name for the fund-raising garden parties that our supporters hold to raise money for Thatu. These can be as small as a few friends getting together for coffee, to a full scale fete with games tournaments and musical events! We encourage our supporters to do what they can to use their own gardens to raise money for food gardens in Africa. If you would like to hold a Jabula for Thatu, click here to read more and download a fundraising pack.
Thatu Shop
Thatu has an online shop that sells small gifts - these include children's tools, seeds, envelope re-use labels, and various other nice festive season ideas. Please visit the shop by clicking here.
Shop
Network for Thatu
One of the most important things you can do for Thatu is to talk about it! Thatu can really benefit from the people you know. Corporate and Trust donations are vital to Thatu's survival. If you know anyone who works for a large company who could arrange a donation, and who would benefit from the positive publicity being linked with Thatu could bring, please tell them
about Thatu and introduce them to us.
Donate
Simply make a one off cash donation, by PayPal, by clicking here Donate Now
~Ali
~~~~~~~~~~~~~~~~~
Thank you Ali. I already have the Penny Pintchers Appeal, so I have started. This is a charity that I feel many gardeners could get behind. ~Phelan
Sunday, October 08, 2006
The Evolution of a card maker Part 2
Continued
I always favour equipment that can be used again and again to create things rather than a bag of goodies that’ll be used up quickly. Punches, for example, are very cost effective. I can make an unlimited number of paper embellishments from an initial investment of roughly £3 ($5?) and in all the colours of the rainbow. You don’t even have to buy paper if you like the
colour of your junk mail! Oh, and don't forget the humble office hole-punch - it makes great circles for flower centres, eyes or just simple geometric patterns.

I often buy the blank card from a kid’s art section at a toy store. I make two cards from one A4 sheet. It works out a lot cheaper than the packs bought from arts and crafts shops. E-bay is also a good source of equipment and supplies for those times when you don't want to trail into the nearest town. There are an awful lot of card-makers out there so there are the equivalent numbers of online cardcraft supply shops. It’s wonderful, but browsing can soon eat up most of your day!
I like to personalise cards if I can, with names or dates. To do this I learnt calligraphy, as we didn't own a printer in those days. It’s still one of my favourite hobbies and is a bit like riding a bike. You never really lose the knack once you've learnt it, you just get neater! As I say, this
was before my household entered the age of technology and nowadays I will enlist the help of my printer but if it’s an extra special card you can still find me happily sprawled across the floor getting covered in ink for an hour.
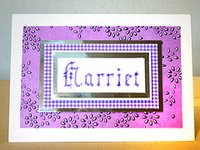
A couple of years ago I decided that it would be great to create an online shop for these cards and try to make a bit of money for more punches and card! With no computer experience I knew that it would be a steep learning curve so I did a very small local community starter course in website design just to get me going. I was so nervous going back to school after 16 years away! With the help of a couple of super-knowledgeable Bookcrossing friends I was able to finish the site early this year (I know, I know it took me forever to complete but it had to come second to everything else in life!) I had a lot of fun designing it and to keep costs to a minimum I use a free webspace. This is the result:
Card making can be as creative as you like or have the time for. I find it very therapeutic to disappear into the spare room for a while and think about design, colour and texture. I just hope I can keep thinking of new ideas for the future.
To Phelan, thank you for allowing me such a long ramble. After I'd got over my gut reaction of feeling terrified, I did enjoy writing!
~Jenny
~~~~~~~~~~~~~~~~
Thank you Jenny. You have some amazing looking cards. When I try to make cards, they turn out looking like a toddler made them. ~Phelan
Want to teach me your hobby, or have a neophyte story to tell? Go to my profile and e-mail me.
I am not sure what is wrong with blogger, it will not allow me to fix the font or font size.
I always favour equipment that can be used again and again to create things rather than a bag of goodies that’ll be used up quickly. Punches, for example, are very cost effective. I can make an unlimited number of paper embellishments from an initial investment of roughly £3 ($5?) and in all the colours of the rainbow. You don’t even have to buy paper if you like the
colour of your junk mail! Oh, and don't forget the humble office hole-punch - it makes great circles for flower centres, eyes or just simple geometric patterns.

I often buy the blank card from a kid’s art section at a toy store. I make two cards from one A4 sheet. It works out a lot cheaper than the packs bought from arts and crafts shops. E-bay is also a good source of equipment and supplies for those times when you don't want to trail into the nearest town. There are an awful lot of card-makers out there so there are the equivalent numbers of online cardcraft supply shops. It’s wonderful, but browsing can soon eat up most of your day!
I like to personalise cards if I can, with names or dates. To do this I learnt calligraphy, as we didn't own a printer in those days. It’s still one of my favourite hobbies and is a bit like riding a bike. You never really lose the knack once you've learnt it, you just get neater! As I say, this
was before my household entered the age of technology and nowadays I will enlist the help of my printer but if it’s an extra special card you can still find me happily sprawled across the floor getting covered in ink for an hour.
A couple of years ago I decided that it would be great to create an online shop for these cards and try to make a bit of money for more punches and card! With no computer experience I knew that it would be a steep learning curve so I did a very small local community starter course in website design just to get me going. I was so nervous going back to school after 16 years away! With the help of a couple of super-knowledgeable Bookcrossing friends I was able to finish the site early this year (I know, I know it took me forever to complete but it had to come second to everything else in life!) I had a lot of fun designing it and to keep costs to a minimum I use a free webspace. This is the result:

Card making can be as creative as you like or have the time for. I find it very therapeutic to disappear into the spare room for a while and think about design, colour and texture. I just hope I can keep thinking of new ideas for the future.
To Phelan, thank you for allowing me such a long ramble. After I'd got over my gut reaction of feeling terrified, I did enjoy writing!
~Jenny
~~~~~~~~~~~~~~~~
Thank you Jenny. You have some amazing looking cards. When I try to make cards, they turn out looking like a toddler made them. ~Phelan
Want to teach me your hobby, or have a neophyte story to tell? Go to my profile and e-mail me.
I am not sure what is wrong with blogger, it will not allow me to fix the font or font size.
The Evolution of a card maker Part 1
Because of some feed problems, today's guest blogger post will be in two parts.
One day I bought a magazine which had a nice looking free gift taped to the front. It was a set of three sponge stamps. They all had a Christmas theme – a holly leaf, a crown and a star. The instructions in the magazine looked fairly simple so that year I made half a dozen cards for my immediate family using some gold and silver paint and coloured card. I'd never had the urge
to create cards before and it was more than likely inspired purely by boredom but those few cards were to be the start of an enduring hobby!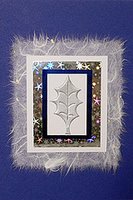
For the first few years of making cards I concentrated on Christmas cards. I love Christmas and all its sparkly decorations so it wasn't difficult to find inspiration. The colours are easy if you stick with red and green! I bought a bag of corrugated green Christmas trees, found a scrap of Christmas material to use as a background square and just stuck it all together with a
spot of PVA glue! At that stage I had limited time after work and at weekends so it seemed like a good hobby to start as each card can take as long as you like. An easy card can take 20 minutes whereas a more complicated design can take hours.
Further down the line I attempted wedding cards as we'd been invited to one! A few squares of lilac mulberry paper decorated with satin flowers from the dressmaking shop and it was soon finished. After that I tried to make a card for each occasion that cropped up on my calendar – birthdays, Christenings, anniversaries, congratulations, etc. I ended up with an almost complete repertoire of different types of cards. I'd take a photo or scan of each one
to help remind me of what I'd already done and to give me inspiration in the future in case I ran out of ideas.
Nowadays one thing I consider carefully is the budget. Being a full-time mum makes me think twice about buying the latest super-duper craft tool that'll sit gathering dust under the bed after a couple of attempts. I like to keep it simple: a few punches and a straight slide cutter will suffice for most cards. You can do without the slide cutter if you've a steady hand with the
scissors (I haven't!).
Double-sided sticky tape has to be best card-making discovery I made. It saves a lot of mess and hassle getting your fingers glued together and you don't have to wait for it to dry. There are many types of double-sided tape and some are stickier than others! It’s a case of trial and error. The less sticky type can be used for sticking things down such as pieces of card or paper that might end up a little crooked and need repositioning. The stickier ones, such as double-sided Sellotape are good for fabrics. Another good find was a glue pen which works like a Biro. It’s great for tiny bits of paper or very detailed gluing. My 6yr old daughter found that you can write with it and sprinkle with glitter for a lovely effect!
Continued>>>>>>
One day I bought a magazine which had a nice looking free gift taped to the front. It was a set of three sponge stamps. They all had a Christmas theme – a holly leaf, a crown and a star. The instructions in the magazine looked fairly simple so that year I made half a dozen cards for my immediate family using some gold and silver paint and coloured card. I'd never had the urge
to create cards before and it was more than likely inspired purely by boredom but those few cards were to be the start of an enduring hobby!
For the first few years of making cards I concentrated on Christmas cards. I love Christmas and all its sparkly decorations so it wasn't difficult to find inspiration. The colours are easy if you stick with red and green! I bought a bag of corrugated green Christmas trees, found a scrap of Christmas material to use as a background square and just stuck it all together with a
spot of PVA glue! At that stage I had limited time after work and at weekends so it seemed like a good hobby to start as each card can take as long as you like. An easy card can take 20 minutes whereas a more complicated design can take hours.
Further down the line I attempted wedding cards as we'd been invited to one! A few squares of lilac mulberry paper decorated with satin flowers from the dressmaking shop and it was soon finished. After that I tried to make a card for each occasion that cropped up on my calendar – birthdays, Christenings, anniversaries, congratulations, etc. I ended up with an almost complete repertoire of different types of cards. I'd take a photo or scan of each one
to help remind me of what I'd already done and to give me inspiration in the future in case I ran out of ideas.
Nowadays one thing I consider carefully is the budget. Being a full-time mum makes me think twice about buying the latest super-duper craft tool that'll sit gathering dust under the bed after a couple of attempts. I like to keep it simple: a few punches and a straight slide cutter will suffice for most cards. You can do without the slide cutter if you've a steady hand with the
scissors (I haven't!).

Double-sided sticky tape has to be best card-making discovery I made. It saves a lot of mess and hassle getting your fingers glued together and you don't have to wait for it to dry. There are many types of double-sided tape and some are stickier than others! It’s a case of trial and error. The less sticky type can be used for sticking things down such as pieces of card or paper that might end up a little crooked and need repositioning. The stickier ones, such as double-sided Sellotape are good for fabrics. Another good find was a glue pen which works like a Biro. It’s great for tiny bits of paper or very detailed gluing. My 6yr old daughter found that you can write with it and sprinkle with glitter for a lovely effect!
Continued>>>>>>
Sunday, October 01, 2006
Guest Blogger; The Neophyte Knitter
About a month ago, I decided that my book group needed a little spice in their lives, so I suggested that we read Stitch 'N Bitch by Debbie Stoller and told everyone (in my know-it-all voice) to bring "some needles and some yarn" to the next meeting. I ran right out and bought a copy of Stoller's book, read the whole thing--pattern instructions included--in less than 24 hours, and decided this knitting thing didn't look so hard. Oh, how the high and mighty are soon humbled.
Step number one, now that I've read the book, get some needles and yarn. No problem, I think. I head over to the big chain craft store and walk to the knitting/crochet/needlework section. I get my first look at just the needle choices, and am somewhat stunned. There are needles made of hard plastic, flexible plastic, bamboo, aluminum, and rosewood. There are needle sizes from 0 to 25, and everything in between. There are straight needles in 13 inch lengths, 14 inch lengths, and oh-my-god-who-in-their-right-mind-would-ever-knit-something-that-big lengths. There are circular needles, some of which separate into lots of bits so you can swap cables and needles around and basically get everything in an unholy mess. There are the terrifying double point needles. I know they have something to do with socks and the tops of hats, but I'm afraid to go there now. The choices were overwhelming. I ended up grabbing a couple of metal 14" #8 needles. Want to know how I chose them? My six year old liked them because they were pink and shiny. It was good enough for me.
So, I've got needles, now I need yarn, right? I turn around and see three full rows of yarn. Fat yarn, skinny yarn, fluffy yarn, yarn with sequins, yarn with fur, scratchy yarn, yarn that's soft enough for baby blankets. This, too, was a bit overwhelming. I finally find some 100% cotton yarn in a denim color that feels good and looks like a pretty neutral color. I'd read that you should always have enough yarn from the same dye lot to complete your project, so I dutifully check the lot number and make sure they're both the same. They are. I buy two skeins. What I'm going to do with them, I still have no idea.
I get home and flip to Ms. Stoller's beautiful casting on instructions. The diagrams are easy to follow. Ms. Stoller says several times in the book that casting on is difficult and that I shouldn't get frustrated if it takes me a few tries. It takes me one try. One, and I'm casting on like a pro. I'm thinking, "Wow, this is supposed to be hard ? Why did I wait so long to pick up this hobby?" Then, I try to knit my first row. I've cast on so tightly that I have to hold my breath and force the right hand needle between the yarn and the left needle. I finally get it worked in there, flip my yarn around the tip of the right needle, and get ready to draw it back through and make the loop. Hah. After much swearing under my breath and turning red in the face, I get it through. I do this for 24 cast on stitches. It never once occurs to me that I can cast on loosely and save myself this pain. The second knit row is a little easier. I only split the yarn twice. Now I have 26 stitches. This I do not notice, but it doesn't seem to matter all that much as by the time I hit the fourth row, I've dropped at least two more. I'm about even, I think. I enjoy this for about an hour, then pain starts shooting up my right arm from my little finger to my elbow. This is my sign to call it quits for the night.
I pick things back up the next night and try again. Still, not much luck. I decide, "Screw this, I'm waiting until book club to touch it again." Fortunately, we have an expert knitter, someone who actually taught knitting classes, in our group. She sees my frustration, gives me some yarn, and shows me how to loosen up a bit. With her supervision, I whip up 30 beautiful garter stitch rows (garter stitch means all rows are knit; no purling for me yet).
With my newfound confidence, I head back to the craft store. "Must've just been the yarn the first time," I think. I buy some beautiful pink, blue, and green variegated yarn. I look at the label and see that it recommends #10 needles. Okay, no problem. There's a sale this week. I find a pair. I buy blue this time to satisfy my eight year old. I get home and start up with the garter stitch. I'm still not really sure what I'm doing, but I've mastered the art of casting on, and I think I can knit. After a few days, and my first successful join (I had to add a second skein), I end up with this:
I decide that maybe this is pretty fun after all and make yet another trip to the craft store. I buy more needles and more yarn. I start looking for yarn on the Internet. There's some fabulous stuff out there. I mean, I knew about wool yarn , but I didn't realize there were so many types. And I had no idea there was bamboo yarn! I really want to try that. It sounds perfect for the Texas heat.
I discover quickly that knitting can be an expensive hobby if you don't watch out. But I also find that there are lots of people who buy old thrift store sweaters and unravel them to make new and exciting things. I'm not sure yet how to construct a sweater, so I'm not quite ready yet to unravel one, but I'll get there one day.
I'm still pretty limited to rectangle-shaped things. I made a second scarf that added the purl stitch and made stockinette:
I'm on my third scarf now. It's looking pretty good. I think I'm going to move on to hand towels next. Some day in the not too distant future, I plan to really stretch myself and make a hat. Or add fringe to something. I can see how people get addicted to knitting. It's hard to put the needles down. It's seriously cutting into my reading time. Fortunately, there are plenty of books and blogs about knitting, so I can combine the two addictions and get my money's worth from both.
If you think you might be interested in knitting, I recommend the following books and websites:
BOOKS;
Stitch and Bitch by Debbie Stoller
Mason-Dixon Knitting by Kay Gardiner and Ann Shayne
Websites;
Crazy Aunt Purl - This woman makes me laugh like crazy.
Yarn Harlot
Knitty
And the most helpful site of all, KnittingHelp.com - I love this woman. She shows you how to do everything
~Jenny O
~~~~~~~~~~~~~~~~~~
Thank you Jenny O. I know nothing about knitting. I tried crocheting once, but couldn't get the hang of it. I was laughed at "if you can make chainmaille, why can't you crochet?" Because metal is easier to work with. For me anyway. So I find people that can knit fascinating. No, not in the "They have a hand growing out of their forehead" kind of way. ~Phelan
Want to teach me something? Have a neophyte story to tell? email me at eirennaigh at juno dot com and tell me all about it. Please keep it on DIY projects, include your pictures and links.
Step number one, now that I've read the book, get some needles and yarn. No problem, I think. I head over to the big chain craft store and walk to the knitting/crochet/needlework section. I get my first look at just the needle choices, and am somewhat stunned. There are needles made of hard plastic, flexible plastic, bamboo, aluminum, and rosewood. There are needle sizes from 0 to 25, and everything in between. There are straight needles in 13 inch lengths, 14 inch lengths, and oh-my-god-who-in-their-right-mind-would-ever-knit-something-that-big lengths. There are circular needles, some of which separate into lots of bits so you can swap cables and needles around and basically get everything in an unholy mess. There are the terrifying double point needles. I know they have something to do with socks and the tops of hats, but I'm afraid to go there now. The choices were overwhelming. I ended up grabbing a couple of metal 14" #8 needles. Want to know how I chose them? My six year old liked them because they were pink and shiny. It was good enough for me.
So, I've got needles, now I need yarn, right? I turn around and see three full rows of yarn. Fat yarn, skinny yarn, fluffy yarn, yarn with sequins, yarn with fur, scratchy yarn, yarn that's soft enough for baby blankets. This, too, was a bit overwhelming. I finally find some 100% cotton yarn in a denim color that feels good and looks like a pretty neutral color. I'd read that you should always have enough yarn from the same dye lot to complete your project, so I dutifully check the lot number and make sure they're both the same. They are. I buy two skeins. What I'm going to do with them, I still have no idea.
I get home and flip to Ms. Stoller's beautiful casting on instructions. The diagrams are easy to follow. Ms. Stoller says several times in the book that casting on is difficult and that I shouldn't get frustrated if it takes me a few tries. It takes me one try. One, and I'm casting on like a pro. I'm thinking, "Wow, this is supposed to be hard ? Why did I wait so long to pick up this hobby?" Then, I try to knit my first row. I've cast on so tightly that I have to hold my breath and force the right hand needle between the yarn and the left needle. I finally get it worked in there, flip my yarn around the tip of the right needle, and get ready to draw it back through and make the loop. Hah. After much swearing under my breath and turning red in the face, I get it through. I do this for 24 cast on stitches. It never once occurs to me that I can cast on loosely and save myself this pain. The second knit row is a little easier. I only split the yarn twice. Now I have 26 stitches. This I do not notice, but it doesn't seem to matter all that much as by the time I hit the fourth row, I've dropped at least two more. I'm about even, I think. I enjoy this for about an hour, then pain starts shooting up my right arm from my little finger to my elbow. This is my sign to call it quits for the night.
I pick things back up the next night and try again. Still, not much luck. I decide, "Screw this, I'm waiting until book club to touch it again." Fortunately, we have an expert knitter, someone who actually taught knitting classes, in our group. She sees my frustration, gives me some yarn, and shows me how to loosen up a bit. With her supervision, I whip up 30 beautiful garter stitch rows (garter stitch means all rows are knit; no purling for me yet).
With my newfound confidence, I head back to the craft store. "Must've just been the yarn the first time," I think. I buy some beautiful pink, blue, and green variegated yarn. I look at the label and see that it recommends #10 needles. Okay, no problem. There's a sale this week. I find a pair. I buy blue this time to satisfy my eight year old. I get home and start up with the garter stitch. I'm still not really sure what I'm doing, but I've mastered the art of casting on, and I think I can knit. After a few days, and my first successful join (I had to add a second skein), I end up with this:
I decide that maybe this is pretty fun after all and make yet another trip to the craft store. I buy more needles and more yarn. I start looking for yarn on the Internet. There's some fabulous stuff out there. I mean, I knew about wool yarn
, but I didn't realize there were so many types. And I had no idea there was bamboo yarn! I really want to try that. It sounds perfect for the Texas heat.I discover quickly that knitting can be an expensive hobby if you don't watch out. But I also find that there are lots of people who buy old thrift store sweaters and unravel them to make new and exciting things. I'm not sure yet how to construct a sweater, so I'm not quite ready yet to unravel one, but I'll get there one day.
I'm still pretty limited to rectangle-shaped things. I made a second scarf that added the purl stitch and made stockinette:
I'm on my third scarf now. It's looking pretty good. I think I'm going to move on to hand towels next. Some day in the not too distant future, I plan to really stretch myself and make a hat. Or add fringe to something. I can see how people get addicted to knitting. It's hard to put the needles down. It's seriously cutting into my reading time. Fortunately, there are plenty of books and blogs about knitting, so I can combine the two addictions and get my money's worth from both.
If you think you might be interested in knitting, I recommend the following books and websites:
BOOKS;
Stitch and Bitch by Debbie Stoller
Mason-Dixon Knitting by Kay Gardiner and Ann Shayne
Websites;
Crazy Aunt Purl - This woman makes me laugh like crazy.
Yarn Harlot
Knitty
And the most helpful site of all, KnittingHelp.com - I love this woman. She shows you how to do everything
~Jenny O
~~~~~~~~~~~~~~~~~~
Thank you Jenny O. I know nothing about knitting. I tried crocheting once, but couldn't get the hang of it. I was laughed at "if you can make chainmaille, why can't you crochet?" Because metal is easier to work with. For me anyway. So I find people that can knit fascinating. No, not in the "They have a hand growing out of their forehead" kind of way. ~Phelan
Want to teach me something? Have a neophyte story to tell? email me at eirennaigh at juno dot com and tell me all about it. Please keep it on DIY projects, include your pictures and links.
Saturday, September 23, 2006
Guest blogger; Flaming Chutney
Thanks so much Phelan for inviting me to be your guest blogger this week. There are so many things I am interested in, that I struggled to decide what to write about, and threw the choice open to a poll in my Livejournal. From several options, a clear winner emerged, and that was making condiment preserves; home made chutney, jam, and marmalade.
I am what you might call an urban fantasy homesteader. Whilst my early life was spent deep in the English countryside, learning to write in the dirt and learning the names of edible plants and field foods on long walks with my granny whilst she kept one eye peeled for mushrooms; life has very firmly replanted me in the middle of London, England.
This could hardly be a more urban context - and yet, I still have a very strong urge to grow and create and make things for myself. My hand made cards and gifts business, my interest in the preservation of allotments, my knitting, and my involvement with a gardening charity,Thatu, which helps to create organic permaculture food gardens in areas of South Africa that are challenged by inhospitable environment, poverty, and AIDS; I suppose the common thread to these is a Marxist style notion that when man owns the means of production (in my case – these two hands!) and employs them to his own benefit, he is engaging in labour for himself which will provide him a sense of self worth and satisfaction.
Without wandering off too much into philosophy, my point is that whether or not engaging in 'home made' and 'DIY' activities is thrifty or saves you money, it is good for you. It is satisfying to the inner person, and for that reason alone, activities that promote self reliance (the homesteading ideal, if you will) are just as worthwhile whether you live in a high rise in Tokyo or on a homestead in Kansas.
I suppose I became interested in preserves because my late aunt and father always made lemon curd, and chutney, and wild bramble jam. For many years I was put off even trying, because it always seemed an arcane art that involved thermometers, setting points, and all manner of special equipment.
Then one day I came across a recipe for Grapefruit marmalade, which was so straightforward that literally anyone could do it. I refer you to Nigella Lawson's Book How to be a Domestic Goddess, for her ‘Pink Grapefruit Marmalade’ . In spite of having a title that feminism seems to have passed by, it is in fact an invaluable book filled with excellent recipes including several wonderful jams, jellies, chutneys and preserves. The results of this recipe are delicious with some lovely crusty bread,
Once the fallacy of difficulty had been shattered, nothing could stop me. I tried all sorts of preserves! I have even ended up selling them, because the flavour and texture of homemade marmalade, jam and chutney is so vastly superior to anything you might find in the supermarket, that if you make the mistake of giving some away early in your preserve making career, you will soon find a path being beaten to you door and demand outstripping supply!
And so, it is my very great pleasure to present to you the secret recipe for my 'Flaming Chutney'. Don't tell ANYONE!
Flaming Chutney
Makes about a litre.

INGREDIENTS:
1kg Sharp cooking apples {2 lbs}
125g Sultanas {4 oz}
2 Medium onions
4 Bird's eye chillies (red for preference)
500g Demerara (brown sugar with coarse, large granules) {17 oz}
2 Teaspoons Ground Allspice
2 Teaspoons Ground Cloves
1 Teaspoon salt
1/2 Teaspoon ground black pepper
1 Tablespoon grated fresh ginger
2 Teaspoons turmeric
700ml cider vinegar 5% acidity {23 oz}
YOU ALSO NEED:
Rubber Gloves
Very large metal or enamel saucepan - I use one that can hold 4 litres - you need room to stir!
4 x 1/2 litre jars or equivalent
Ladle
METHOD
Core, peel and roughly chop apples.
Finely chop onion.
Seed the chillies and chop finely WEARING RUBBER GLOVES to prevent burns.
Put all ingredients into the pan and bring to boil.
Cook over medium heat for 40 minutes, and until the mixture is thick and evenly brown.
Spoon into clean sterilized jars.
Re-using glass Jars
Re using glass jars is economically sensible and environmentally sound. According to Recycling-Revolution.com, the energy saved from recycling one glass bottle can run a 100-watt light bulb for four hours. It also causes 20% less air pollution and 50% less water pollution than when a new bottle is made from raw materials. So, it's worth saving your old pasta sauce jars and giving them another use. {editorial from Phelan, if re-using pasta sauce jars to can, do not use them in a pressure cooker. In the US, the USDA says they shouldn't be used to can at all. They are weaker than jars bought for home canning and can break in a pressure canner}
Sterilizing them for home use is much simpler than you might think. Turn the oven to 140 degrees C / Gas Mark 1 {284f}. Wash your jars and lids thoroughly in very hot soapy water and rinse, and then put them on a baking sheet in the hot oven until you need them. This sterilizes the jars - they should be still warm when you are filling them later. Some people place waxed paper circles onto the preserve before sealing the lids - this prevents air coming into contact with the food. If you are only making small quantities you are likely to have eaten it all before there is any danger of it having gone off, but if you are planning to make a large quantity you can buy waxed circles and polythene circles (to replace lost lids) from justpreserving.com, or your local store. My only caution would be to say that hot jars and preserves, and kids and animals do not mix, so please keep them elsewhere whilst you are doing this. I like to clear an afternoon, and turn the radio up, so I can get on with it undisturbed.
I hope I have tempted you to give the chutney a whirl, and I would be really pleased to hear about your results.
Thanks for having me, Phelan, and if you ever fancy dropping by for a cheese and chutney sandwich and some jam scones and cream, the door is always open.
~Ali
~~~~~~~~~~~~~~~~~
And thank you! I have yet to make any Flaming Chutney. Looks wonderful! I am asking Ali to be a semi regular guest blogger, as she has a few other things she wants to talk about, things that I am indeed interested in knowing and learning.
There is a lot of details in her post, if you have any questions for her about what you have read above, please leave a comment. She is a regular reader of my blog, and will be around to answer any of your questions.
Ali is also the owner and creator of Farley Heath Designs, The same store I bought my wonderful hand socks, a.k.a. wrist warmers, from.
As soon as I am done with that hike through Ireland I have been promised by another, I will stop by for some of that delicious looking chutney.
Want to be a guest blogger? Have something to teach me, or a neophyte story of your own? Please e-mail me at eirennaigh at juno dot com. Please keep it on topic to do-it-yourself.
I am what you might call an urban fantasy homesteader. Whilst my early life was spent deep in the English countryside, learning to write in the dirt and learning the names of edible plants and field foods on long walks with my granny whilst she kept one eye peeled for mushrooms; life has very firmly replanted me in the middle of London, England.
This could hardly be a more urban context - and yet, I still have a very strong urge to grow and create and make things for myself. My hand made cards and gifts business, my interest in the preservation of allotments, my knitting, and my involvement with a gardening charity,Thatu, which helps to create organic permaculture food gardens in areas of South Africa that are challenged by inhospitable environment, poverty, and AIDS; I suppose the common thread to these is a Marxist style notion that when man owns the means of production (in my case – these two hands!) and employs them to his own benefit, he is engaging in labour for himself which will provide him a sense of self worth and satisfaction.
Without wandering off too much into philosophy, my point is that whether or not engaging in 'home made' and 'DIY' activities is thrifty or saves you money, it is good for you. It is satisfying to the inner person, and for that reason alone, activities that promote self reliance (the homesteading ideal, if you will) are just as worthwhile whether you live in a high rise in Tokyo or on a homestead in Kansas.
I suppose I became interested in preserves because my late aunt and father always made lemon curd, and chutney, and wild bramble jam.
 For many years I was put off even trying, because it always seemed an arcane art that involved thermometers, setting points, and all manner of special equipment.
Then one day I came across a recipe for Grapefruit marmalade, which was so straightforward that literally anyone could do it. I refer you to Nigella Lawson's Book How to be a Domestic Goddess, for her ‘Pink Grapefruit Marmalade’ . In spite of having a title that feminism seems to have passed by, it is in fact an invaluable book filled with excellent recipes including several wonderful jams, jellies, chutneys and preserves. The results of this recipe are delicious with some lovely crusty bread,
Once the fallacy of difficulty had been shattered, nothing could stop me. I tried all sorts of preserves! I have even ended up selling them, because the flavour and texture of homemade marmalade, jam and chutney is so vastly superior to anything you might find in the supermarket, that if you make the mistake of giving some away early in your preserve making career, you will soon find a path being beaten to you door and demand outstripping supply!
And so, it is my very great pleasure to present to you the secret recipe for my 'Flaming Chutney'. Don't tell ANYONE!
Flaming Chutney
Makes about a litre.

INGREDIENTS:
1kg Sharp cooking apples {2 lbs}
125g Sultanas {4 oz}
2 Medium onions
4 Bird's eye chillies (red for preference)
500g Demerara (brown sugar with coarse, large granules) {17 oz}
2 Teaspoons Ground Allspice
2 Teaspoons Ground Cloves
1 Teaspoon salt
1/2 Teaspoon ground black pepper
1 Tablespoon grated fresh ginger
2 Teaspoons turmeric
700ml cider vinegar 5% acidity {23 oz}
YOU ALSO NEED:
Rubber Gloves
Very large metal or enamel saucepan - I use one that can hold 4 litres - you need room to stir!
4 x 1/2 litre jars or equivalent
Ladle
METHOD
Core, peel and roughly chop apples.
Finely chop onion.
Seed the chillies and chop finely WEARING RUBBER GLOVES to prevent burns.
Put all ingredients into the pan and bring to boil.
Cook over medium heat for 40 minutes, and until the mixture is thick and evenly brown.
Spoon into clean sterilized jars.
Re-using glass Jars
Re using glass jars is economically sensible and environmentally sound. According to Recycling-Revolution.com, the energy saved from recycling one glass bottle can run a 100-watt light bulb for four hours. It also causes 20% less air pollution and 50% less water pollution than when a new bottle is made from raw materials. So, it's worth saving your old pasta sauce jars and giving them another use. {editorial from Phelan, if re-using pasta sauce jars to can, do not use them in a pressure cooker. In the US, the USDA says they shouldn't be used to can at all. They are weaker than jars bought for home canning and can break in a pressure canner}
Sterilizing them for home use is much simpler than you might think. Turn the oven to 140 degrees C / Gas Mark 1 {284f}. Wash your jars and lids thoroughly in very hot soapy water and rinse, and then put them on a baking sheet in the hot oven until you need them. This sterilizes the jars - they should be still warm when you are filling them later. Some people place waxed paper circles onto the preserve before sealing the lids - this prevents air coming into contact with the food. If you are only making small quantities you are likely to have eaten it all before there is any danger of it having gone off, but if you are planning to make a large quantity you can buy waxed circles and polythene circles (to replace lost lids) from justpreserving.com, or your local store. My only caution would be to say that hot jars and preserves, and kids and animals do not mix, so please keep them elsewhere whilst you are doing this. I like to clear an afternoon, and turn the radio up, so I can get on with it undisturbed.
I hope I have tempted you to give the chutney a whirl, and I would be really pleased to hear about your results.
Thanks for having me, Phelan, and if you ever fancy dropping by for a cheese and chutney sandwich and some jam scones and cream, the door is always open.

~Ali
~~~~~~~~~~~~~~~~~
And thank you! I have yet to make any Flaming Chutney. Looks wonderful! I am asking Ali to be a semi regular guest blogger, as she has a few other things she wants to talk about, things that I am indeed interested in knowing and learning.
There is a lot of details in her post, if you have any questions for her about what you have read above, please leave a comment. She is a regular reader of my blog, and will be around to answer any of your questions.
Ali is also the owner and creator of Farley Heath Designs, The same store I bought my wonderful hand socks, a.k.a. wrist warmers, from.
As soon as I am done with that hike through Ireland I have been promised by another, I will stop by for some of that delicious looking chutney.
Want to be a guest blogger? Have something to teach me, or a neophyte story of your own? Please e-mail me at eirennaigh at juno dot com. Please keep it on topic to do-it-yourself.
Sunday, September 17, 2006
Sunday Guest Blogger; Why I like Living out here
We have a storm brewing, and as we tend to lose electricity with storms, this is being posted early.
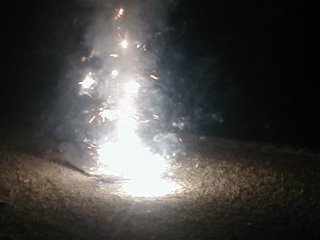
I like to live here because you get more room to do stuff and to play.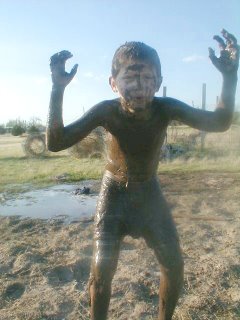
I look at the stars and clouds.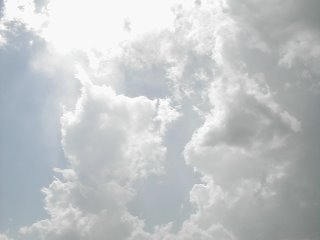
I work in the garden and with chickens.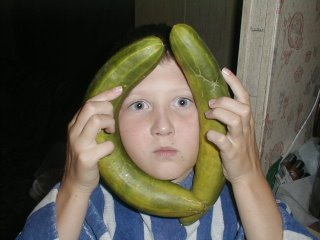
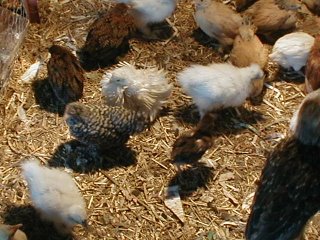
I get to watch air planes go by and camp and dig a hole.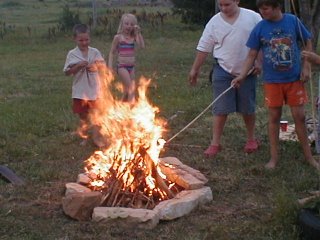
It isn’t noisy or bright at night.
~gormdragan
~~~~~~~~~~~~~~~
Gormdragan is 9 years old and wants to be an marine life photographer when he grows up.
Have as story you want to share about homesteading, or being a neophyte? E-mail me at eirennaigh at juno dot com. I will post pics and the links you want.
I like to live here because you get more room to do stuff and to play.

I look at the stars and clouds.

I work in the garden and with chickens.


I catch toads, frogs, chickens and bugs.

mom says he needs to trim those nails!
I get to watch air planes go by and camp and dig a hole.

It isn’t noisy or bright at night.

~gormdragan
~~~~~~~~~~~~~~~
Gormdragan is 9 years old and wants to be an marine life photographer when he grows up.
Have as story you want to share about homesteading, or being a neophyte? E-mail me at eirennaigh at juno dot com. I will post pics and the links you want.
Sunday, September 10, 2006
Guest blogger: Bringing home the sheep
Hello Dear Readers,
Phelan has invited me to guest-blog today. She wanted me to write about something I have mastered as a result of homesteading for the past 3 years. Well, I don't believe that I've created enough mastery in any one aspect of rural living, so I'll tell you about the newest additions to our humble pile o'caliche.
One of the online communities I belong to, as a result of living frugally, Freecycle, has provided us with some great finds, the latest being 8 grown Karakul sheep. The owner was able to deliver only 4 to begin with (we only joke about having to download them from the internet), and we are still waiting on the other 4.

The sheep were huge in their wooliness, and we acted as soon as we could to relieve them of their overcoats. We naively opted for the hand shears, picked up at an old-style ranch supply store near the airport in Austin, and we opened up our copy of Barnyard in Your Backyard to the proper page one fine evening.
We'd done a little reading about shearing competitions, so we thought that we'd be done long before dark. Two hours later, I finally had to go check on our son, who was sitting in the dark in his play area, and I also had to run an extension cord from the well house to the garage and plug in DH's old desk lamp so we could finish the job.

[BTW, our son was not actually in the dark; he was sitting in his play tent shaking his new battery-powered maraca that lights up with various colors when shaken. Did I mention that he's just turned 1? He's my smart little cookie!]

We finally got a good rhythm going with the shears, but still had to trade off, as they were physically hard to use. At one point, some sort of bee was tormenting us, and I finally zapped it with some OFF! The temperature didn't come down much from the daytime, so we were still sweating (no, not perspiring nor glowing--SWEATING like horses running from an F5 tornado) at 9:30 when we were satisfied with our first shear job.
Of course, when the professional shearers from Johnson City came out (on Labor Day, what great guys), they said it looked like we went at it with a pair of scissors. Well, compared to what their set-up was capable of, I guess he did look pretty scruffy. We even left one little dread behind his left ear for character.
This part of my story does come with some sad news, however. Just before the Labor day weekend, we noticed that one of the males was not with the herd, so DH went looking for him. The carcass was in the back corner, near where the large garden will be next year. It appeared to be the work of coyotes, or possibly the neighbors' dogs (they took several goats from the place next door last year). Not much we could do at that point, but to haul it up on one of our burn piles and let the vultures have their way with it. When the county lifts the burn ban, we'll toss what we have in the freezer (a whole other story I've included elsewhere) onto there and say our goodbyes.
Well, friends of Phelan, I hope you've found my story entertaining. The Beatles concert on PBS is over (my son was watching it during his bedtime boycott), so I need to get everyone to bed.
Yours in critter-wrangling,
Marina
~~~~~~~~~~~~~~~~~~~~~~~~~~~
Thank you Marina!
Drop on over to Tales of a Texas FarmWife and see what else she has been up to.
We have all started out as a neophyte, do you have a story to tell? Have you mastered a skill, or just pretty darn good at it, then teach me. e-mail me at eirennaigh @ juno dot com and I will post your story, pictures and links. Please keep it on the subject of do-it-yourself type projects such as {my hobbies} learning to cook, making crafts { I make chainmaille} dealing with livestock/pets, building your own home/fencing/barn/chicken tractor... you get the picture.
Phelan has invited me to guest-blog today. She wanted me to write about something I have mastered as a result of homesteading for the past 3 years. Well, I don't believe that I've created enough mastery in any one aspect of rural living, so I'll tell you about the newest additions to our humble pile o'caliche.
One of the online communities I belong to, as a result of living frugally, Freecycle, has provided us with some great finds, the latest being 8 grown Karakul sheep. The owner was able to deliver only 4 to begin with (we only joke about having to download them from the internet), and we are still waiting on the other 4.
The sheep were huge in their wooliness, and we acted as soon as we could to relieve them of their overcoats. We naively opted for the hand shears, picked up at an old-style ranch supply store near the airport in Austin, and we opened up our copy of Barnyard in Your Backyard to the proper page one fine evening.
We'd done a little reading about shearing competitions, so we thought that we'd be done long before dark. Two hours later, I finally had to go check on our son, who was sitting in the dark in his play area, and I also had to run an extension cord from the well house to the garage and plug in DH's old desk lamp so we could finish the job.
[BTW, our son was not actually in the dark; he was sitting in his play tent shaking his new battery-powered maraca that lights up with various colors when shaken. Did I mention that he's just turned 1? He's my smart little cookie!]
We finally got a good rhythm going with the shears, but still had to trade off, as they were physically hard to use. At one point, some sort of bee was tormenting us, and I finally zapped it with some OFF! The temperature didn't come down much from the daytime, so we were still sweating (no, not perspiring nor glowing--SWEATING like horses running from an F5 tornado) at 9:30 when we were satisfied with our first shear job.
Of course, when the professional shearers from Johnson City came out (on Labor Day, what great guys), they said it looked like we went at it with a pair of scissors. Well, compared to what their set-up was capable of, I guess he did look pretty scruffy. We even left one little dread behind his left ear for character.
This part of my story does come with some sad news, however. Just before the Labor day weekend, we noticed that one of the males was not with the herd, so DH went looking for him. The carcass was in the back corner, near where the large garden will be next year. It appeared to be the work of coyotes, or possibly the neighbors' dogs (they took several goats from the place next door last year). Not much we could do at that point, but to haul it up on one of our burn piles and let the vultures have their way with it. When the county lifts the burn ban, we'll toss what we have in the freezer (a whole other story I've included elsewhere) onto there and say our goodbyes.
Well, friends of Phelan, I hope you've found my story entertaining. The Beatles concert on PBS is over (my son was watching it during his bedtime boycott), so I need to get everyone to bed.
Yours in critter-wrangling,
Marina
~~~~~~~~~~~~~~~~~~~~~~~~~~~
Thank you Marina!
Drop on over to Tales of a Texas FarmWife and see what else she has been up to.
We have all started out as a neophyte, do you have a story to tell? Have you mastered a skill, or just pretty darn good at it, then teach me. e-mail me at eirennaigh @ juno dot com and I will post your story, pictures and links. Please keep it on the subject of do-it-yourself type projects such as {my hobbies} learning to cook, making crafts { I make chainmaille} dealing with livestock/pets, building your own home/fencing/barn/chicken tractor... you get the picture.
Sunday, September 03, 2006
Urban Homesteading: General Topics
I have discussed the 3 general topics that can be accomplished as an urban homesteader. Since Donkeys can't sleep in the bathtub, and I have no advice on making your own clothing, I was told it is cheaper to buy, then to make clothing though I save torn cloths to make quilts with later, the urban homesteading class has come to an end. You might be interested in Path to Freedom.
If there is something that you wish for me to go over in detail, please ask me. If not, I will be taking guest blogers to discuss their topic of interest on Sundays. With links to your site.
If you are interested in being a guest blogger, please e-mail me at eirennaigh @ Juno dot com
If there is something that you wish for me to go over in detail, please ask me. If not, I will be taking guest blogers to discuss their topic of interest on Sundays. With links to your site.
If you are interested in being a guest blogger, please e-mail me at eirennaigh @ Juno dot com
Subscribe to:
Posts (Atom)
