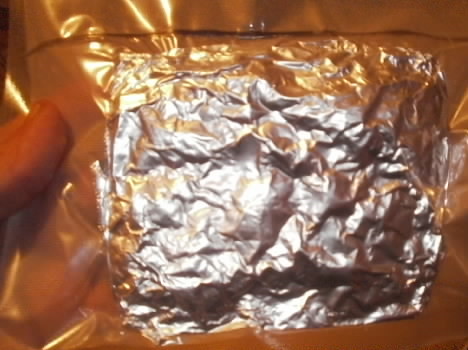
Donate Now!

Donate Now!
Buy a membership or koozies to help!
Showing posts with label food preservation. Show all posts

Saturday, May 19, 2012

Braaaaaaainnnsssssssssssss

The alternative title would be; Homemade (how to make) turkey bologna. But it was lacking any type of pizazz. And as you know, I am so into the glitz and glam. . . . No wait, it freaking looks like brains.

I do have recipes for cooking brains if any one is interested. I, myself ain't too keen on the flavor, nor the texture, but if you wish to be prepared, and perhaps a posh zombie, I will gladly hand it over to you. For now though, let's make do with a bit of bologna.

I did a ton of research on nitrates. I know a lot of you don't want to eat it. Too bad, we eat it all the time in green veggies. And this thing about meats proclaiming no nitrates, they use celery juice or salt, which is chalk full of nitrates. Problem with it however, is that the levels aren't reliable and end up not working as it should. Nitrate is dormant until the bad bacteria decided to throw a party. Nitrate acts as the unscrupoulous bouncer throwing every one out that isn't dressed to the bouncer sexual desires. There are even studies out there that are showing that a tad bit of nitrates are actually good for humans. As long as you aren't eating a bowl of over heated pinksalt day after day, it isn't toxic. But just about anything in over abundance will toxify in your system.

But in my great search for the no nitrate lunch meat recipe, I continued to run into writers that would say "I don't want nitrates in my diet so I make my own lunch meat" then proceeded to give me recipes calling for tender quick or pink salt. So there is a huge lack of understanding in what nitrates are. And I do hope those writers went unpaid for those articles. Sorry, but research and fact checking falls on both writer and editor.

Now turkey bologna is a difficult mistress. No one has a good recipe out there. And I don't like liquid smoke. It reminds me of the hamburgers in hospitals. Gag. So I remove it from all recipes from the get go. I found a total of two recipes for it. One called for an entire turkey, everything but the bones and feathers. And a 50 lbs turkey to boot! Honestly, how many of you butcher out and receive 50 lbs of bird. And here I thought I hit the worlds record at 42 lbs. I digress. The second read more like summer sausage than bologna. So I have had to make a trial run, so lay off the pictures. The loaf will eventually start to look more gourmet as I play with it. ( you are older than 12. Though mentally I just giggled as well)

Homemade turkey Bologna ( any one else sing the song as they write out that word?)

3 lbs ground turkey (I used dark meat and whatever fat was on it)
3 tablespoons sugar based curing mix ( here's the make your own version I do)
1/8 teaspoon garlic powder
1/2 teaspoon onion powder
1 cup water
Semolina flour for dusting

The texture of ground turkey is way off base for bologna ( I sung that again) it comes out more like a meatloaf, edible, but lacking in what one desires in a ( ready? Sing it with me) B O L O G N A. So, let's participate in some attempted murder of your food processor. Purée the turkey. You will want to add a handful of crushed ice as you purée as you might end up cooking the turkey meat as the blades heat up.

In a bowl, hand mix, that would be literal, all ingredents together. Dust wax paper with the semolina, wrap and refrigerate for 24 hours.
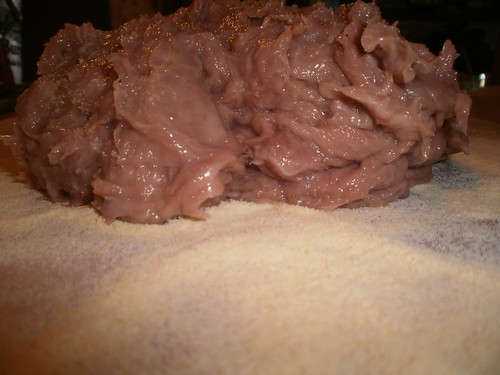
braaaaaainnnsssssss

After the 24 hours, preheat oven to 300f. The flour will have congealed, well it will have the look of congeal-ment. You are going to have to get your hands all dirty and work it in. It will be super sticky and slimy. If you have large enough casings, you can stuff them with this now. I didn't, all I have is lamb intestine and that would only produce those tiny cracker size bologna. Instead I used a loaf pan. Do not add oil to the pan. And I highly suggest that you fill the pan to the brim, and have a catch pan under it, as the meat will shrink up on you, considerably.

Bake for 1 hour and 30 minutes. Remove and cool in pan. Remove from pan and chill in the fridge. Slice and eat.
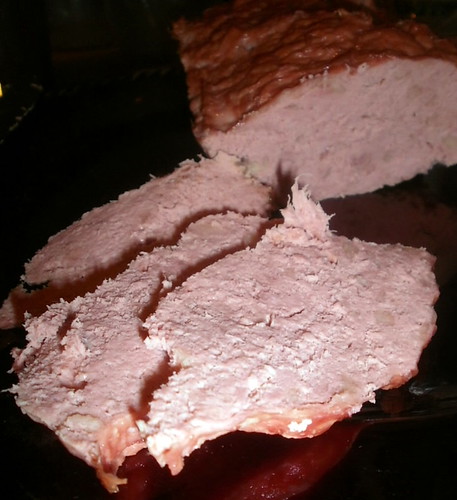
P5180006-001

Now remember, we are working with a sexist bouncer here that has the potential to turn violent on you or not have enough muscle to stop them from over running the joint. So do not double or reduce the recipe. I search long and hard to come up with the correct proportions.

Now I have thinking that this could be canned like spam. Will need to try. However I need to warn you that the FDA considers canning your own meat evil and suicidal.

Friday, May 11, 2012

The slowest stir fry ever

Because the main ingredients to a stir fry are harvested at different times of the growing season. Items must be preserved to create not only stir fries, but egg rolls and spring rolls as well. Not to mention soups.

I also don't harvest with just the stir fries on my mind. I harvest and preserve with other specifics. The stir fries are, again, leftovers or a bit o'extras.

Pea pods. Use to jelly them, but I have more than enough jelly and jams to survive. Pea pods are now chopped and saved in the freezer for later use. I use a food saver with butcher quality bags. Each bag contains just enough of the pods for one meal.

Radishes, carrots, spinach, onion or scallions, pok choy, roasted turkey or chicken bits(from making deli sliced sandwich meats), cabbage, Red bell, red chile, and cilantro are all saved over the course of the spring and fall. sometimes depending on how feisty I am feeling other ingredients is stored as well. after you have squeezed the life out of a lemon, the left over slimy pulp and the zest freeze well.

frozen stir fry

We do two different sizes, family and individual. And yes, all out of extras. I rarely use an entire days harvest for one family recipe. And by the to me harvest is done and the garden is asleep, I have several wonderful meals waiting in the freezer.

I also no longer blanch anything. I know, some one will take issue with that. I did for years, but find it rather unnecessary for my needs. I can't stand blanched then frozen spinach. But that is a personal problem.

FYI, sesame oil does freeze, while soy sauce doesn't. If you are going to freeze some of your oils and sauces for your future stir fries, line an egg carton with foil, pour your required amount into it, then freeze over night to 48 hours. Place in your bag then add to your grouping.

Once the individual ingredients have been frozen, I separate them out into a gallon size food storage bag. At that point it is merely a grab and cook scenario.

As for the soups. As soon as something is harvested, I wash, and cube into small piece just enough of the veggie to cover one layer of my food dehydrator. Once dried I place it into a quart or pint jar, depending if it is for family or individual, and begin to layer the ingredients. Make sure the lid is on tight between layering. Once full, you can oven can it. When needed, merely pour into a pot of broth.

It's all rather simple, and treated as an afterthought, but boy oh boy is it a yummy after thought, as well as a slowly created premade meal for those winter days you are missing spring.

Friday, January 06, 2012

The Vintage Food Processor, my favorite kitchen gadget

Well, my favorite second only to the popcorn popper.

I don't think I have told you guys about this. I am sure many of you have one. I have had mine for a year now.


Yes, an old school salad shredder. I simply love this thing. Boys enjoy shredding potatoes.

I got mine for under $40. But when I went pricing them here awhile ago, they ranged from $50- $200. 

We shred just about everything now that we have it. I had tried the food choppers and those hand crank food processors, you know those white ones with the attached bowl. But I always ended up breaking them rather quickly. I break anything with plastic parts, not on purpose mind you. This one is in it for the long haul, especially since it was made in 1960.

Thursday, October 27, 2011

Unripened Tomato Ketchup

First, I know I am preaching to the choir with my regular readers, but there is a difference between green tomatoes and unripe tomatoes. Green tomatoes can be used like regular red or yellow tomatoes, while unripe tomatoes take a bit longer to prepare.

3 lbs unripe tomatoes
1 1/2 lbs onions
1 teaspoon ground black pepper
1 1/2 teaspoon dry mustard
1/2 teaspoon Worcestershire sauce
1 teaspoon pickling spice
1/2 teaspoon ground hot  pepper
1 cup vinegar 5%
3/4 cup honey

Chop up onion, and saute them over a low heat, with a bit of butter or olive oil. Stir occasionally, while chopping your tomatoes.

Place tomatoes in a small kettle (or deep pot) and mix in the seasonings, Add the Worcestershire sauce to the onions shortly before they turn golden brown on the edges. Cook for a few seconds, just long enough to incorporate the sauce.

Mix everything except the honey together in the kettle.


over a low heat, cover and simmer for 4 hours. Stir occasionally to keep it from sticking.

Remove from heat and puree. Place into a clean kettle and bring to a boil. Stir in the honey (you can use 1 cup of sugar instead) Mix extremely well. 

Pour into your clean jars and hot water bath for 5 minutes.  Makes 2 1/2 pints (recipe can be doubled, stay true to the doubling amounts)


I think it turned out wonderfully, though the color might put some people off a bit. It tastes more like modern ketchup than traditional steak sauce ketchup. And it doesn't take as long to thicken it up. A warning however, honey tends to separate out a bit, so make sure you jar it while still hot, and shake well before use.

And be sure to check out my guest post (recipe) over on  Mohave Rat's blog>>>>  (please take it as a good spirited, believe it or not post that it is)

Saturday, September 10, 2011

(in case you missed it in comments) Canning Dry Goods

I thought I had talked about this before. But I cover so many subjects that there are times I just don't know. So thank you for calling me out on it.

My friend TexasWren sent me some books a few years ago books she used when she was homesteading. And that's how I found out about canning dried goods. It extends the shelf life of them and kills of any possible bug invasion.

Flour,oatmeal,corn meal, etc., but not sugar, can be "canned" in the oven. Heat your oven to 250F, place your dry goods in a canning jar, finger tight lids,  place on a cookie sheet and heat for 1 hour. This will kill the bugs (if any). Turn oven off and allow to cool completely before removing.

If you want to can sugar, make a simple syrup.

Of course there are different ways of doing it, some people don't put the lids on until after the jars (still hot) are removed from the oven. Canning jars can break in the oven while heating, just like they do in the water bath or pressure canners.

Monday, April 04, 2011

3 ways to preserve your broths

Before we start, does everyone here know how to make a basic broth?

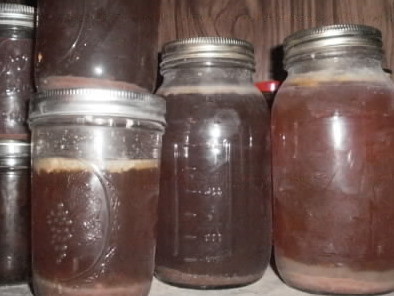
There are 3 ways to preserve your homemade broths, be it beef, chicken or vegetable stock. (broth and stock are indeed different, however are interchangeable in your recipes). With all the following preservations, remove as much fat as possible. You can freeze the fat for use later in soap recipes.

The first is canning. Pour your hot broth into a pint canning jar and pressure can 20 minutes at 10 lbs (11lbs on dial gauges). Allow to cool for 24 hours and then stack up in your pantry.


P4030045-1

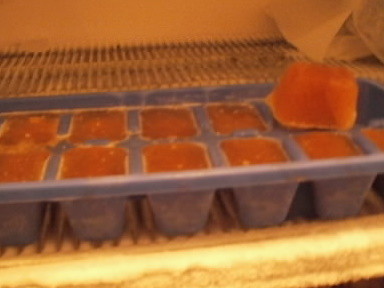
Next is freezing.

Pour your broth evenly into an ice tray. I highly suggest you line your tray with parchment paper or foil. Allow to freeze, remove and store in a freezer bag. Each cube is 1/8 cup of stock. This is also considered a cold bouillon cube.

P4030043-1


And finally, and my favorite, dehydration.

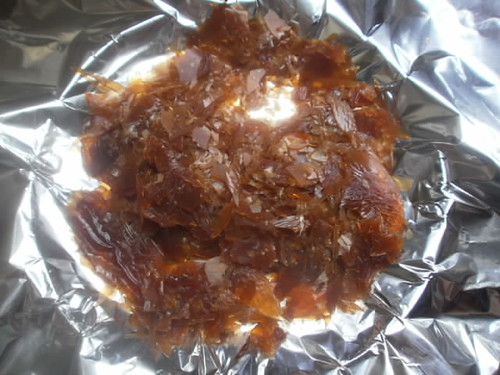
Pour 1 cup of stock onto a fruit rollup tray and place it into my dehydrator. Set it on the meat setting or 145F. It tends to withdraw from the center and pool along the edges. Let sit overnight.


Homemade dehydrated beef broth

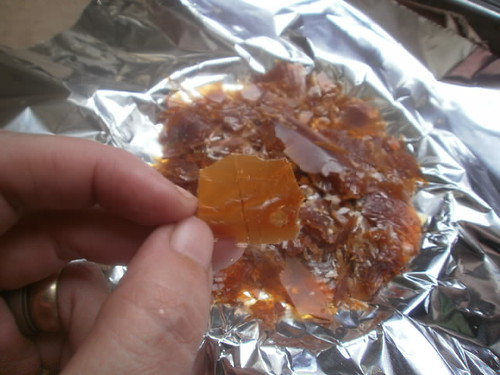
Once dry, peel and crack off the tray onto foil.


beef bouillon homemade

Tightly fold up your foil and place into a zip-lock type bag. If you have a food saver I would use it, and remove as much air as possible.

You end up with a little packet of flavoring that equals 1 cup broth. Kind of like those Ramen packets. You can do more than 1 cup at a time, just be sure you keep track of how much you use. You will need to add the same amount of water to rehydrate it.


P4030049-1


This packet makes 3 cups of broth.

Wednesday, August 18, 2010

Cantaloupe Sherbert


1 cantaloupe, pealed and cut into chunks
sugar
3/4 cup milk


If you have a food processor, puree the cantaloupe, add sugar, blend, add milk blend, then freeze for 4 hours.

no food processor? Place chunks into a small pot, sprinkle with sugar, simmer until soft. Mash and push through a foodmill, whisk in milk, freeze at least 4 hours.

Place in the fridge to thaw slightly before serving.

The amount of sugar to use is up to you. I use the same amount I would use to sprinkle on cantaloupe before eating. If you never use sugar to eat cantaloupe, then use about 2 tablespoons of sugar.

~this post brought to you by "The No More Adventures for a month or so Society"~

Thursday, June 11, 2009

Blowing Away the Competition

Husband was told yesterday by his boss that he blew passed base time. That means he gets flag time, and several hours of flag time. WHOOHOO! Bring in more bikes, please. We have been stressing on money because he hadn't made flag time, and base pay barely covers the bills. Now we can add a little more to the savings.

I am a tad concerned about the weather. Last year we were only able to pull in 350lbs of produce due to the flooding and the cool temps. We aren't having the rain, though we have been threatened by the weather people that we will, but the cooler temps could be a problem with the tomatoes. The beans don't seem to be having a problem with it. We will see. But we are running very low on supplies from last harvest.

American Prepper's are giving stuff away, click to enter.


I have been feeling rather lonely lately. It comes and goes. There is that part of me that wants to take off and hit a bar, and another part of me that asks why? Phelan, you don't like to be around people very much, why put yourself in the situation. Because sometimes it is nice to pretend that I am not a country hick. And maybe I won't smell like cattle that one day. Of course if I was to break out the psycho babel, one reason is reclaiming a youth that I missed by having children and doing this homestead things so young. I was 17. But then again, it would just be nice to have an evening out, away from kids and livestock. Nothing mental about it, just a good time with close friends that I can go 6 months without seeing or talking to.

I am having issues with Murrial not standing correctly, that and her kicking me. Uma, our oldest calf, looks to be indeed pregnant. She is a fat little thing, as tall as my 5 year old and very very wide. Eddie's udder is starting to fill, but she shouldn't be due for 2 more months. I am thinking that my math might have been off and we will be calving in July. I am so excited about it. Babies are always exciting.

Waste not want not

Split Pea soup

16 ounces dried split peas
2 cups sliced sausage/ham hock
1 1/2 diced carrots
1 medium onion, chopped
2 garlic cloves, minced
2 bay leaves
1/2 teaspoon salt
1/2 teaspoon pepper
5 cups chicken stock
1 cup hot milk

Using a crockpot, layer the first 9 ingredients in order, no stirring. Cover and allow to slowly cook for 5 hours. Pour in the hot milk and stir. Pour into your hot sterile jars (discard any large leaves) and process in a pressure canner for 40 minutes.


Pea Hull Jelly

4 cups juice from cooked hulls
5 cups sugar
1 package pectin

Wash pea hulls well, use as many as you wish. Cover with water. Boil until tender. Drain juice through several thicknesses of cheesecloth, reserving the liquid. Add pectin to measured liquid. Bring this to a boil. Add sugar and return to a hard boil (can't be stirred down). Hard boil for 10 minutes. Pour into hot sterile jars and seal. Water bath for 5 minutes.

Wednesday, February 11, 2009

Canned Meat

And the green meat goes, do dodo dodo dododo do. . . oh wait, that's Lou Reed, not Canned Heat. You are welcome for the earworm.

We have to talk spam. There is no way you can go through a canned meat concert without spam. Now mind you I do not have the recipe for the store bought, nor have I found anything good online. The only one I found was kind of nasty, and not a real recipe. Does your chickens have any lips? After some trial and error, I have discovered a reasonable substitute . Stop groaning, some people like spam. I myself ain't to thrilled with it, but making it at home you can use up some of your extra pork and chicken parts if you don't feel like making more sausage.

You need scrapes of ham and chicken. Push through your meat grinder. Place this in a food processor, add a dash of paprika, garlic powder, salt and pepper. You can get fancy and add other flavors. Puree the meat. Stuff into a pint canning jar leaving 1 inch headspace, and process in a pressure canner for 90 minutes.

Now we got that out of the way, let us talk about canning meat. There are reasonable fears out there about canning meat. You don't want to mess up an entire batch, wasting the food, or you don't want to end up poisoned. Canning meat is just as simple as canning green beans. Just more people like to put the fear into you about it.

Step one, work clean. If you are process something on the counter, make sure you wash the counter down good before placing a new chunk of meat down on it. Keep your hands clean, and sterilize everything.

Here are the basic guidelines to meat canning.

We can start with chicken,

Once you have dressed your bird out, allow it to chill for at least 6 hours. Remove as much fat as possible. For canning raw (this is best with your bannies) Fill your pints or quarts with raw meat, do not add any water, and leave an 1 1/6 head-space. Do not pack the meat tightly, it should be loosely sitting in the jar. In your pressure canner process your boneless chicken for 75 minutes in pints, 90 minutes for quarts. Got bones? 65 minutes for pints, 75 minutes for quarts.

Follow these directions for turkey as well. Rabbit is the same process, expect that you need to soak the rabbit meat in salted water (1 tablespoon salt per quart water) for 1 hour, than rinse well.

Now for hot packing the above meats.

Cook the meat in whatever manner you see fit until it is only 2/3 of the way cooked. Fill your hot sterile jars loosely, cover with the broth or water leaving 1 1/4 inch head-space. Process in a pressure canner, no bones, 75 minutes for pints, 90 minutes for quarts. Got Bones? 65 minutes for pints, 75 minutes for quarts.

Chunks of meat.

So you have your beef, pork, lamb and venison. Your smoker is full as is your freezer, or maybe you just feel the need to can something. Well do I have instructions for you!

Make sure the meat is chilled and remove excess fat. Cut into cubes, or plain ole chunks and pack loosely into your hot sterile jars. Do not add water and leave 1 inch head-space. Process with a pressure canner, pints 75 minutes, quarts 90 minutes.

To hot pack these meats, you will need to cook your meat rare. Fill your jars and cover with boiling broth or water (tomato juice if your kinky) leaving a 1 inch head-space. Process in a pressure canner, pints 75 minutes, quarts 90 minutes.

Canned hamburger? Are you kidding me? Nope and I did see it brought up on another blog, of course this person was going to buy it from a supplier instead of making there own. Saute your ground meat fill your jars, cover with boiling broth (not the fat) or water (tomato juice if your kinky) leaving a 1 inch head-space. Process in a pressure canner, 75 minutes for pints, 90 minutes for quarts.

Of course you can flavor these products however you wish, except do not add a salt substitute, it turns bitter. Do not eat your meat unless you have boiled it uncovered for 10 minutes.

All these times are for altitudes below 1,000 ft (this is standard with just about all general canning guides) And your dial should be at 10 or 11 PSI. (or weight gauge in lbs)
1,001-2,000 dial gauge at 11 PSI, weight gauge at 15 lbs
2,001-4,000 dial at 12, weight gauge at 15 lbs
4,001-6,000 ft dial at 13, weight gauge at 15 lbs
6,001-8,000 ft dial at 14, weight gauge at 15 lbs
8,001-10,000 ft dial at 15, weight gauge at 15 lbs

The above isn't just for meat, it is for all your pressure canning food stuff.

Any questions?

Do you want me to cover fish and seafood as well?

Friday, November 07, 2008

Putting Food By; when to use it.

Lots of thoughts racing through my already congested head. Those guys need to watch it, so that there isn't a nasty pile up. One of those thoughts is a sleek red sports car, being driven by a drunk teen boy.

This drunk teen is a gluten. He races around the other's informing them that they need to give in and use up their food stores. He only thinks of the now, the instant gratification that his age group is famous for. The same age group that is known for thinking themselves immortal. But he can not zoom around forever, at some point the other's will have to pull over to allow him to have the right away, or the Sheriff will come down on him. I know it can be hard, but we all know what the right thing to do is, call the cops.

With the cops called, a dangerous chase begins. Will the drunk in the sports car beat out the cop in the sedan? Will the teen crash and kill himself and others? Will the cop catch him and help him go through rehab? That one is on me. Currently the chase is still on, but the cop is inching close to the drunk.

What my really bad metaphor is leading to, is that when things become scary for us, we tend to think more about the here and now. As my survivalist post pointed out, don't expend all that energy just to run around blind, screaming into the wind. We have to stop, and take a breath. Things might be bad for you right now, but can it get worse. What kind of future are you heading toward, and what needs to be done right now.

In the past, my food stores were gone through with no thought of the future. I should know better, but I am still really close to being that drunk teen. Now I see SWAT peeking from around the corner, and well as the ME waiting behind them. My home is no longer guaranteed to have an income. Food and shelter is my priority. I have put a bit of food by, not as much as I would have liked, but enough that there is no fear of starving, but when should I use it all? I have thought this over and decided that as long as I have a little money, I will use my food stores carefully, putting that drunk in jail, with a chance of being ORed out.

Meadowlark, the article you inspired is over here, A Vegan Thanksgiving Guest.

Wednesday, October 22, 2008

TAG!!! Apple Sauce!

I was patching up one of the fences Sunday, we share a fence line with several horses, and they like to bend the fences over because the grass is greener on this side (I guess). When I heard hooves beating the ground. I looked back and sunny was running toward me. I stood up, and he stopped, so I went back to work, keeping my ear out for him. He walked up, and nudged my hair. I turned, not wanting him to grab a mouth full of it. I have had the goats do that before, not fun. Sunny pushed against my shoulder, made a high pitch horse noise and ran off. I shrugged and went back to work. Sunny came back, and repeated the nudge. I reached up to scratch him, and he took off. The third time he did it, I stood up and followed. He stopped a little ways from me and waited. But as soon as I got into a n arms length of him, he booked. I turned around to go back to my fence, when he ran back around. Once again waiting until I was an arm length away, before running off again. We did this several times, before he stopped running and allowed me to scratch him. He pushed his forehead into my chest. I am still trying to get over the fear of horse bites. I have heard horror stories to that effect. (Like a kid who got an ear bitten off, and that woman on AFV that got her chest bit, still don't see how half those videos were ever funny).

I told my husband about Sunny's behavior, and he said that Sunny has done that to him before, he seems to like to play tag.

In canning news,

I worked on a bit more of my apples. Somehow a bad one got into my cellar stored ones, so process we must, before the whole bunch is spoiled. I made Spiced apple butter. Same as apple butter (plain) except replace the water you soak them in with spiced rum.

Also made Apple Pie Apple sauce. Taste like Christmas.

Apples soaked until tender in water, and but through a food mill into a crock pot. 2 tablespoons of vanilla, cinnamon, sugar, nutmeg, cloves and ginger to taste. Cook on low until the preferred thickness of applesauce.

Thursday, October 16, 2008

You will need, Jam, Jelly, Butter and Ketchup

No commentary today, just the facts ma'am.

Pear Butter

9 cups of pears, washed, peeled and chopped
6 cups of sugar
juice of a lemon or and juice of 1 orange and the peel
Cook pears over a medium heat with some water to prevent sticking, until soft. Run pears through a food mill. Return to cleaned pan, add sugar and juice. Cook over a low heat, uncovered, until think enough that it will hold up a wooden spoon.

Vanilla Pear Jelly
8 large pears, stemmed and blossom ends removed, then quartered with peel left on
2 tablespoons vanilla extract
3-1/2 cups cane sugar
1 (1.75 ounce) box powdered pectin

Wash fruit. Place in pot and pour water to barely cover pears. Boil uncovered for 35-45 minutes. Fruit should look translucent. Strain the juice through a double layer of cheesecloth or use a jelly bag. Do not Squeeze, or the juice will become cloudy.
Sterilize jars.
Heat 3-1/2 cups of the pear juice (don't have enough? you can add as much as 1/2 cup water), add the vanilla and pectin. Bring to a boil, add the sugar. Bring back to a boil, until the sugar is completely dissolved and you are at a hard boil (hard boil means you can not stir it down) about 10 - 20 minutes.
You should begin to see the mixture thicken on the back of a wooden spoon and form 2 side-by-side droplets at this point.. Turn the heat down and skim off the foam. Return to a boil for another five minutes. Using the "spoon test", the jelly should be thick enough to "sheet" in small waves on the back of your spoon.
Pour into sterilized jars and add lids. B-w bath for 5 minutes .Makes 6 to 7 (8 ounce) jars.

Spiced Pear Jam
8 cups peeled finely chopped ripe pears (about 5 1/2 lb.)
4 cups sugar
1 teaspoon ground cinnamon (or more according to your taste)
1/4 teaspoon ground cloves

Place all the ingredients to a dutch oven.
Bring mixture to a boil, stirring constantly.
Reduce heat and simmer, stirring frequently, for 2 hours or until thickened.
Sterilize jars
Skim off foam with a metal spoon.
Pour immediately into hot jars, leaving 1/4 inch head space.
Remove any air bubbles and wipe jar rims.
adjust lids
Process in a b-w bath for 10 minutes.
Makes 5 half pints

Pear Ketchup
1 Tbsp. unsalted butter
2 pears, peeled, cored, and cut into 1-inch chunks
1 Tbsp. finely minced cooking onion
½ tsp. kosher salt
1/8 tsp. freshly ground white pepper
4-inch sprig of fresh rosemary, leaves only, very finely minced
2½ Tbsp. pear vinegar
1 tsp. raw sugar
1 large star anise
1 small bay leaf

In a small frying pan over medium heat, melt butter and saute the pears for 2 minutes. Add onion and continue sauteing for an additional 5 to 7 minutes or until the pears have softened but not turned color.
Remove from the heat allow to cool. Place the cooled pears in a food processor with salt, pepper, rosemary, vinegar, and sugar, puree. Return the mixture to the frying pan, add the star anise and bay leaf. Simmer for 5 to 10 minutes, until the mixture thickens to the consistency of ketchup.
Remove the ketchup from heat and set aside to cool for 1 to 2 hours. Discard the bay leaf and star anise and taste--if the pears used were too sweet, you may want to add another ½ tablespoon of vinegar.
You can keep refrigerated for 6 weeks and frozen for 6 months. This recipe only makes 3/4 cup of ketchup.


I wonder what will happen tomorrow.

Wednesday, October 15, 2008

Pear Busters

With a combined experience of 350 years in apricot dancing, your hosts use their past experiences to sort out the truths of the pears.

Today on Pear Busters, we received a letter from Holly. She was amazed to hear that a man had turned a pear into Ice Cream. I think it is plausible, but the only way to find out for sure is to Bust Pears!

We tried various techniques, from pushing and pulling, to biting and creaming, but the results were never what we had hoped for. The pears turned out to be nothing but frozen clumps. Then, last night we were watching Pear Week, on the Neophyte Channel, and the episode of When Pears Attack made things click. I mean this wouldn't be an episode of Pear Busters if we didn't find our own way of busting this pear.

Here's what we discovered. . .

Canned pears make and excellent sorbet!

Ginger Pear Sorbet
1 jar pear halves
1/4 cup sugar
2 tablespoons lemon juice
1/8 teaspoon ground ginger

Drain the pears. Reserve 1 cup of the syrup, set pears aside.
In a small saucepan, bring the sugar and reserved syrup to just a boil. Remove from the heat and allow to cool.
Using a blender, process the pears, lemon juice and ginger until smooth. Add in the cooled syrup, cover and process until pureed smooth. Pour into an 11-in. x 7-in. dish. Cover and freeze for 1-1/2 to 2 hours or until only partially frozen. Return the mixture to the blender, process until smooth. Place in a freezer container. Cover tightly and freeze for at least 3 hours. Remove from the freezer 20 minutes before serving.
Makes 3 cups


We also discovered that you can use the pear raw.

Brandy Pear Sorbet
3/4 cup apple juice
1/2 cup sugar
5 pears
1/2 cup apple juice
3 tablespoons brandy
heat the 3/4 cups apple juice with sugar in a Small sauce pan, bring to just a boil. Remove from heat and allow to cool. Wash, peel and quarter pears. Puree the pears with the 1/2 cup apple juice and brandy. Pour cooled syrup over the puree and process until well combined. Place in a freezer container, cover and freeze for 2 hours. Reprocess in the blender. Refreeze.
Makes 8 cups

These all can be placed into your 1/2 pint jars to be frozen. Just leave 1/2 inch head space.

So is this Pear Busted? Nope, Sorbeted!


Hope you are enjoying Pear Week on the Neophyte Channel. Coming up. . . "I would say he was yea big." "NO! DON'T GO THAT WAY!" "I never saw it comin'. It was just, oh goodness, there. ya know." "Never saw anything like that before." "Today we will find him, and prove he really does exist."

Tuesday, October 14, 2008

Got Pears?

I have a trunk loaded down with hard pears. And as sore as I seem to be this morning, a sarcastic, whoopee!

Today we will start simple, and hopefully get increasingly creative with our pears throughout the week. Oh yes my friends, you are entering PEAR WEEK! Some material may not be suitable for children under the age of 14.

When Pears Attack.

Phelan was a stay at home mom. Making a living writing about the thing she loved the most, pears. Her research took her out to her squatter's mother's boyfriend's house, Where a hard pear tree stood alone. It's branches reaching down, yearning to devour all that might creep under it. Phelan has spent many years studying the pear, and felt confident that she could handle what laid ahead. Little did she know that this pear tree harbored ill will toward the homesteader.

She calmly walked up to the tree, making pear soothing noises, something that only a handful of people in the world are able to master. She reached up to pluck one of the many pears, when. . . OH THE HUMANITY.

Hey there folks, looking to know about Salmon and how to cook it up? Well have I got a deal for you. For only $19.99 Gina will show you how. Not available in stores, so order now by going to Woman Not Dabbling in Normal.

Phelan, a writing homesteader, reached up to pluck the pear from the tree. It snapped off gently, but sent a ripple throughout the branch. An avalanche of pears came down on her head. The pear tree was set in motion, his revenge began. Luckily for us, Phelan was so use to the migraines, that a little bonk on her head did nothing to deter her. She spoke to the pear tree in his native tongue, words that we can not repeat here on daytime television. Then set herself in motion to remove the trees weapon of choice. She threw them into her trunk, and removed them from the scene. Hoping that this would save any future traveler harm. She brought the pears home, where she could study them further. The first thing she discovered was that they could be caned in a simple syrup.

Hello ladies. Have you ever wondered how you could truly send your man into a frenzy? I bet you have. The cooks on All Foods Natural wondered the same thing. If you are female, and at least 18 years of age, you too can have the secret to a man's desire. For only $19.99, You can have Just for the Ladies. Act now, supplies are limited.

With the pears now in her laboratory, Phelan set to work to discover their secrets. Simple syrup seemed to be the easiest and quickest way to pacify the trees weapons.

4 cups water or juice
2 cups sugar
yields 5 cups thin syrup

Wash the pears, cut them in half or in quarters. Core them (stems removed), use some lemon juice the keep their color true. Pack into pint or quart jars, pour boiling syrup over them, leaving 1/2 inch head space. Adjust lids. Process in a B-W Bath (boiling water bath) 20 minutes for pints, 25 minutes for quarts.

With this first step in the research, Phelan came to discover that these canned pears make excellent pear pudding later on.

Are you prepared for PEAR WEEK!

Thursday, September 18, 2008

Pizza the Hut was found dead earlier today in the back seat of his stretched limo.

This is for 1 pizza. It doubles easily.

2 tablespoons olive oil
1 tablespoon butter
1/2 cup onion, chopped
1/4 cup celery, chopped
1 garlic clove, minced
1 (8 ounce) can tomato sauce
1 (6 ounce) can tomato paste
2 tablespoons grated Parmesan cheese
1 teaspoon dried basil
1 teaspoon dried oregano
1/2 teaspoon salt
1/2 teaspoon sugar
1/4 teaspoon black pepper
1 small bay leaf
1 teaspoon fennel seed

  • Using a large skillet, melt the butter with the oil. Add onion, celery and garlic and saute until soft and transparent.
  • Add tomato sauce and paste, stir until smooth.
  • Add all the remaining ingredients and bring to a slow simmer.
  • Simmer for 30 minutes.
  • Remove the bay leaf and pour into your sterile jars. Process in a food bath for 40 minutes.

For those with simpler tastes

28 oz crushed tomato

2 tbs extra virgin olive oil

2 large garlic gloves, minced

salt and ground black pepper to taste

Mix all together and set aside for a few hours. Pour into a sterile jar and process for 40 minutes in a hot water bath.

These recipes are for 1 pizza. I did it this way because pizza making is not a necessity on a homestead, but having premade sauce on hand sure makes things a lot easier some days. I am assuming that everyone knows how to make paste and plain sauce. If not, yell at me and I will be happy to tell you how to do it.

Wednesday, September 17, 2008

Stuff

I was informed via email yesterday, that The Happy Homesteader on Mother Earth News has me listed as one of their favorite blogs. If you look at the list, you might recognize a few of them.

I made 5 pints of pizza sauce. I need to make more if I plan on making it an entire year. I already have enough ketchup to make it through.

Potato soup, here I come!

Cows escaped last night. They were grazing in the front and my husband left the gate open after he got home. That was a real joy, hunting down black cows at 11 o'clock at night. We found them 1/2 mile away. So happy they hadn't discovered the corn field across the road. I would have never got them to follow me home. I lectured my husband on gate keeping as I have my 3 boys and their friends.

.

Wednesday, September 10, 2008

Catch up, would you.

As the hysteria that is canning season peaks, the titles of my posts will be groaners. As I tell my kids, that's how I roll.

Yesterday I processed 6 pints of Ketchup. you will need,

1 house to yourself
3 Cd's
6 celery ribs, cut into 1/4-inch pieces
2 medium onions, peeled and diced (about 2 cups)
1/4 cup water
3 pounds tomatoes, quartered
5 Tablespoons vinegar
1 cup (packed) dark brown sugar
1/2 Tablespoon allspice berries
1/2 Tablespoon whole cloves
1/2 Tablespoon celery seeds
1 teaspoon ground mace
1/2 teaspoon salt

If it is cool enough outside, open back door. Put Cd's in CD player, and start player. (my first selection was Sound Garden "B Side")

Carefully wash, core and quarter your tomatoes. Placing them in a heavy stock pot. Using a potato masher, smoosh the heck out of them. Cook over a medium heat. Bring to a light boil for 20 minutes.

Meanwhile. . .

Put you celery, onion and water in a medium saucepan. Cook over a medium heat. You will need a "Spoonman" to stir the mix occasionally. Cook until almost soft, 25 minutes.

Add the celery and onions to you mashed tomatoes, continue cooking until the vegetables are completely softened, 15 minutes. Strain tomato mixture in small batches through food mill into another small stock pot.

Stir in the remaining ingredients. Place the pot over medium high heat and bring to a boil. Continue boiling, stirring often to be sure that the ketchup is not sticking to the bottom of the pan, until the mixture thickens, kind of, for 15 to 20 minutes. Ladle into your sterilized pint jars, and process in a hot water bath for at least 40 minutes. Makes 1 1/2 pints.

I make larger batches of this recipe. I managed to listen to all 3 of my cds. I discovered yesterday that the stupid, embarrassing mom dance is hereditary. As I wiggled to some System of a Down, singing at the top of my lungs, stirring my ketchup over the stove. My neighbor walked in my open door. Let the giggle commence.

Tuesday, September 09, 2008

What's the Dilly, Yo?

I heard you. You hate sweet pickles, same here. Yesterday I put up some Kosher Dill Pickles.

4 quarts water
6 tablespoons coarse white Kosher salt
18-20 cucumbers, scrubbed
8 cloves garlic, unpeeled and lightly-crushed
2 tablespoons pickling spice (recipe below)
6 bay leaves
1 large bunch of dill, going to seed, washed

In a large pot, heat 1 qt of the water with salt until dissolved. Add the remaining water.

Sterilize 3 quart canning jars

divide the garlic, spices, bay leaves, and dill amongst them.

Pack the cucumbers vertically into the jars, making sure are very tightly-packed.

Fill the jars with brine so that the cucumbers are completely covered. Hot water bath for 20-30 minutes. Ready to eat in 3 days.

Pickling spice:

2 tablespoons black peppercorns
2 tablespoons mustard seeds
2 tablespoons coriander seeds
2 tablespoons hot red pepper flakes
2 tablespoons allspice berries
1 tablespoon ground mace
2 small cinnamon sticks, crushed or broken into pieces
24 bay leaves, crumbled
2 tablespoons whole cloves
1 tablespoon ground ginger.

In a small dry pan, combine peppercorns, mustard seeds and coriander seeds. Place over medium heat and stir until fragrant, careful not to burn them. Keep the lid handy in case seeds pop. Crack peppercorns and seeds in mortar and pestle (or use the side of a knife on cutting board).

Mix together all ingredients. Store in a tightly sealed plastic or glass container.

Monday, August 25, 2008

A Shocking Purple

I finished the peaches this weekend. Made 3 pies.

Saturday I went to my mother's house. It was my youngest brother's birthday and I went earlier to get some more of those grapes done. Mom and I got into position, and started processing. I placed the pureed grapes in a pot on the stove, then leaned over touching the stove, to turn on the burner. Some of you may remember that I have accused my mother of trying to kill me in the pas. Well Saturday she made yet another attempt. As I touched the stove I got a 100 volts through my hand, into my arm, stopping at my spine. How do I know it was 100 volts? Because after I was done doing the Phelan ritual dance of I've been shocked! My step father broke out his voltage meter. I think I am done with electricity at this point. How many time now? 3?

Mom called a friend in, he is an electrician. He found some future problems and fixed those, but was unable to discover what exactly was wrong with the coil. They left that one burner disconnected. Sure, that made me feel lots better about touching it.

Friday, August 22, 2008

Why, Hello My Little Peach

I took a break from grapes yesterday and tackled some of those peaches that have been patiently waiting for me.

Peach pie filling

3 lbs peaches (peeled, cored and sliced)

2 tsp lemon juice

1 tsp lemon zest

1/2 cup granulated sugar

1/2 cup packed light brown sugar

1/4 tsp nutmeg

1/2 tsp allspice

1/4 tsp salt

1/2 tsp crystallized ginger

Mix together and stuff into 1 quart and 1 pint jars. you an freeze or process in a hot water bath for 20 minutes.

you will need tapioca for a thickening agent when you go to use the filling. 3-4 tablespoons. (if you want your pie to have a lattice top, mix tapioca with only 2/3 of the filling, place the 1/3 without on top of the 2/3 with. This will prevent the tapioca from getting hard)

If you want to use this filling for something other then pie. Make up some buttermilk biscuits for breakfast. Heat peaches in a sauce pan, adding 1 cup heavy whipping cream to every pint of mix. Pour over hot biscuits, and watch as everyone devours it and begs you for your share.

Tomorrow is my turn to post at Woman not dabbling, I have been going over and over what recipe I should post. Here's where you can help. We all seem to be knee deep in some sort of produce, what one do you need a recipe for. I will use the most commented produce as my subject, and post a not so normal recipe for it tomorrow.
Related Posts Plugin for WordPress, Blogger...