Donate Now!

Donate Now!
Buy a membership or koozies to help!
Showing posts with label peanuts. Show all posts

Monday, October 19, 2009

I'm going nuts!

I am not really going nuts, more legume.


Peanuts are an important plant in my garden. Why? You ask. Because my boys love them. The enjoy planting them, harvesting them {WOOHOO We get to play in the dirt} and eating them. The process of turning them into peanut butter {the peanuts, not the boys} is fascinating to my two little ones. {We have an elephant that helps turn the peanuts into paste that the little ones use} My father even gets into the whole peanut experience.


I have had several of you ask me if you too can grow peanuts. Of course you can {ok I am being silly} Peanuts can be grown as far north as New England. The two types of peanuts you should look into are the Valencia peanut and the Spanish Red. The Valencia is a smaller peanut that will produce hardily, it is very small and are typically the ones that you roast and salt. The Spanish red are the ones you buy roasted in jacket, they do not produce as well as the Valencia variety but their flavor is superior.

Growing peanuts are rather easy. Work the soil well and deep, except for those of you in the north, plant them no deeper than 1 ½ inches. This shallow planting will encourage quicker growth and prevent damp rot in the wet spring.

If this is a new area you are cultivating, make sure to add compost or aged manure to your soil turning.

Plant 4 kernels per mound. your mounds should be 18 inches apart in rows that are 2 feet apart.

If it isn't real warm outside, it will take a little time for your peanuts to shoot up sprouts. In warm climates you should see sprouting in 7 days, cooler weather will take up to two weeks. When your plant has reached 6 inches tall, begin cultivating. When the plants reach 1 inches, hill the rows. This is important because you plant will send out roots to the side of the mounds. Leaves will begin to drop off and start a new plant. After hilling, mulch between your plants with at least 8 inches of straw or grass clippings. This will help feed your hungry plants. After that, your job with them is done until harvest.

You will want to allow a heavy frost to completely destroy the plants tops. Lift the plants out with a garden fork and shake loose the dirt. Pluck the pods from the roots and set into a shallow pan to allow to air dry. It will take 2 months of drying before you should roast them.

I hope this was helpful to those of that have been asking. Enjoy your peanuts! And if you have any questions {not just about peanuts} feel free to ask.

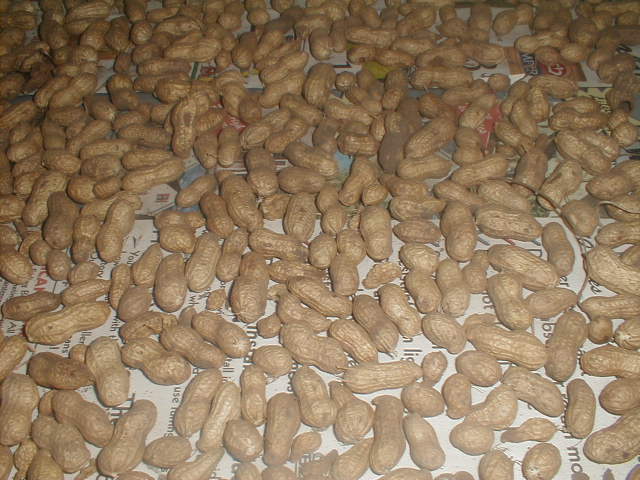
This is a repost, My father died 2 years ago, not long after this picture was taken.

Wednesday, November 08, 2006

Peanuts

We planted our peanuts at the same time as our sweet potatoes. They need a soil temp of 70f. They were Virginia Peanuts, the large ones that are sold for snacking.

Last year we had a decent crop, and seed saved for this year. Unfortunately, this crop didn't do as well. We have talked about heading over to the sand pit that's a few miles down the road and buying some sand for the garden. That will help several of our plants be more successful.

We are just going to eat these and re-buy peanuts for next spring.

I have two articles out in this months All Foods Natural newsletter, and one just happens to be on Thanksgiving. D-day for our turkey is November 20th, I will warn everyone that I will be posting about our first turkey slaughter on the 20th, and post it on the 21st. {So those that want to avoid it, can. }

My husband and I have sat down and wrote out what we normally have for Thanksgiving dinner. With the 100 mile Thanksgiving Challenge, we have discovered that we have just about everything that we need here, the only things we don't, are coffee, sugar, and chocolate. We can live without the chocolate pie, but coffee. . . we need to figure something out or we will have a very grumpy day.

Any one else taking the 100 mile Thanksgiving Challenge? How are your menu plans coming along?

Thursday, June 08, 2006

a few roots in my garden


Onions

I have never done well with growing my own onions. Most of them die or stay small. I still don’t know what I have done wrong. This year I have many, over 400. And they are growing nicely. Too nicely in fact. I was only expecting half to grow, that’s why I bought so many. Last year I hung the ones I had in a nylon stocking in my coat closet. {We all smelled like onions in the winter} This year we will have to clean out the cellar and try to keep them in there. I am grateful that I do use a lot of onions in my cooking.

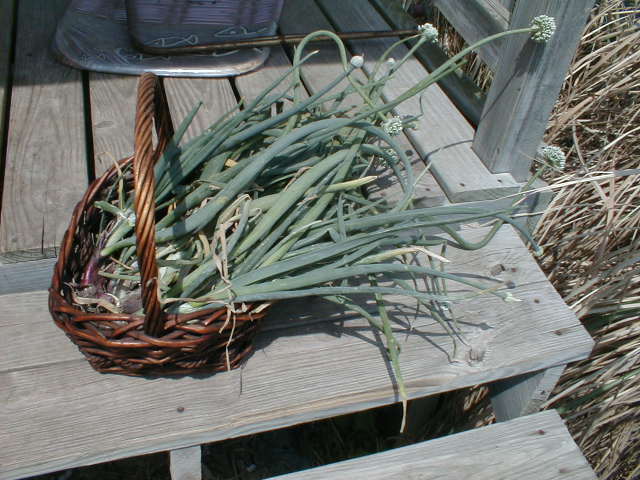
I walked out the other day and found that some of my plants where growing flowers. Oddly enough I found this thrilling, next year I will try and grow onions from seed. I have read the books and I am prepared.

Potatoes

I have had trouble with them as well. The first year they didn’t want to grow, the next they were flooded out. This year we went the route of the lazy bed. The lazy bed is a very wide and tall row, and instead of burying the seed potatoes, you cover them with straw. All of the seed potatoes that we planted are sprouting. Now if someone could tell us how to keep the wheat {from the straw} from growing. But because of this, we are going to go ahead and try growing and grinding our own grains.

Sweet potatoes
Last year I had wonderful sweet potato vines, no roots. This year we are trying again.

Peanuts

Last year’s harvest was ok. We ate only a few, and then placed the rest in a nylon stocking and hung them in the barn to dry out. We left them there all winter to be planted this spring. I actually did something right! They are growing. My plan is to have enough peanuts to make 12 quarts of peanut butter and enough to replant next year. {And we started 3 grape vines for the jelly}

Garlic

My garlic died last year, all of it. Turns out that it is best planted in the fall and left over winter. I will try again at that time.

Carrots

My first year with carrots was a good one. The boys would go out and pull them right out of the ground to eat. {Sometimes they washed them first} The next year, I only got one. I found a sandy spot in the garden and planted them close to the tomato plants. Looks like a good year.

The picture above is of the onions that were ready to bolt. This is the same amont that I had in total last year.


Related Posts Plugin for WordPress, Blogger...